Digital Microscope

One of the coolest things about technological progress is that it feeds on itself. New technologies generally make new processes feasible (or possible), and this inevitably leads to new toys tools that we engineers can use to make even cooler stuff.

Recently, inexpensive consumer-grade digital “microscopes” have gotten pretty good, at least in terms of imaging. For around $65US, you can get a CCD “microscope” that can produce clear images at something like 60x magnification and can resolve objects down to something like 10-20 microns. While this isn’t anywhere near the performance of a professional microscope, it’s a very useful benchtop tool — with a few caveats.
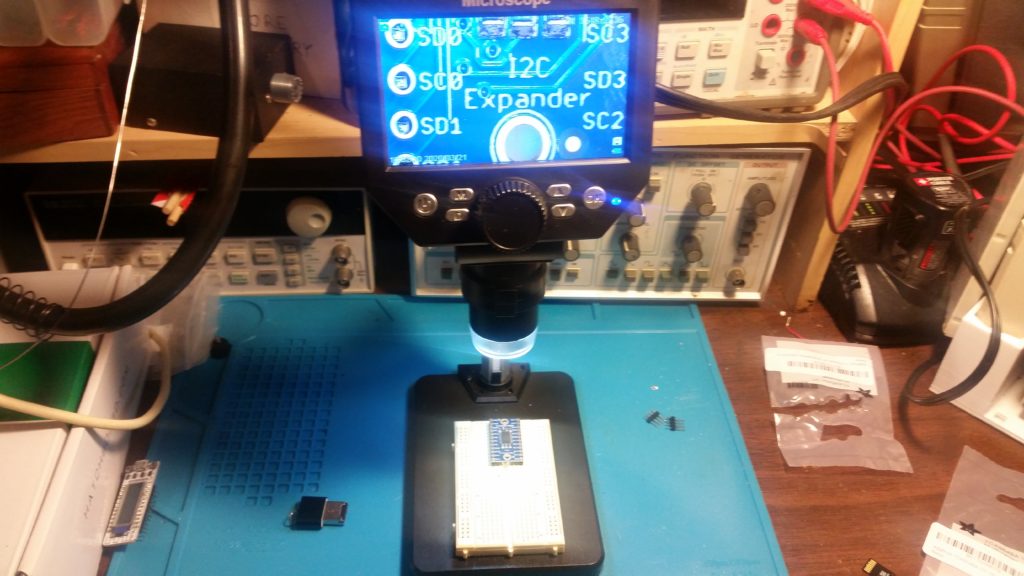
The microscope, examining an I2C expander from Adafruit.
(This is the minimum zoom achievable with the stock stage.)

The biggest problems are related to the mounting. The camera may well have a 10MP sensor (hard to say; the images come out at 10MP but are .jpgs and may be upscaled) — but the mounting stand is cheap and tends to shake and flex when used. Maximum zoom is limited by the optics, which can only focus down to a minimum distance of a few centimeters from the object. Minimum zoom is limited only by the maximum height to which the mounting can move the camera; the optics themselves are capable of focusing on objects at infinity. Vertical movement is accomplished by a rack-and-pinion system which, being mostly plastic, binds up, preventing smooth motion, and has far too much backlash / hysteresis.

Many of these problems can be corrected by mounting the camera securely to a better gantry, such as a 3D printer or CNC mill. For board-inspection work such as the inspection of solder joints, the existing stage works reasonably well. Still, an additional $10 or $20 cost would have been a small price to pay for a more solid mounting and maybe metal or even nylon gears.

Once you work around the mounting limitations, though, the images aren’t bad…
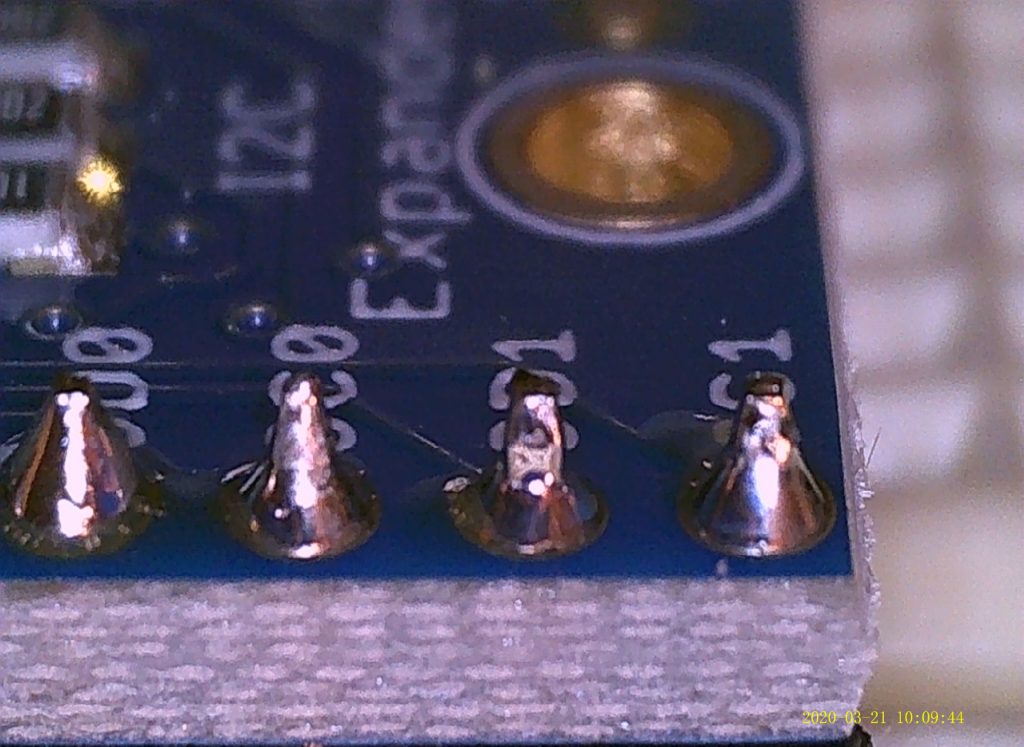
Maximum zoom, used to inspect four pins on the I2C Expander module.
For scale, these pins are spaced 2.54mm (0.1″) apart.
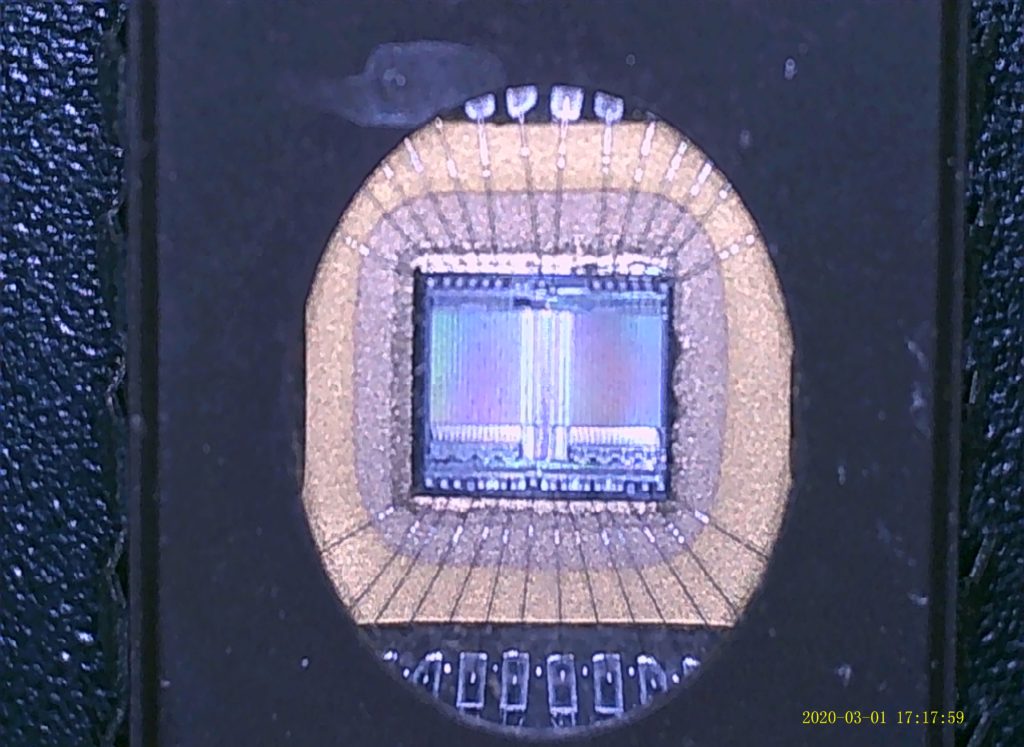
Near-minimum-zoom view of a UV-erasable EPROM chip.
This is a DIP28 600-mil package, so it’s roughly 15-16mm (0.6″) across.
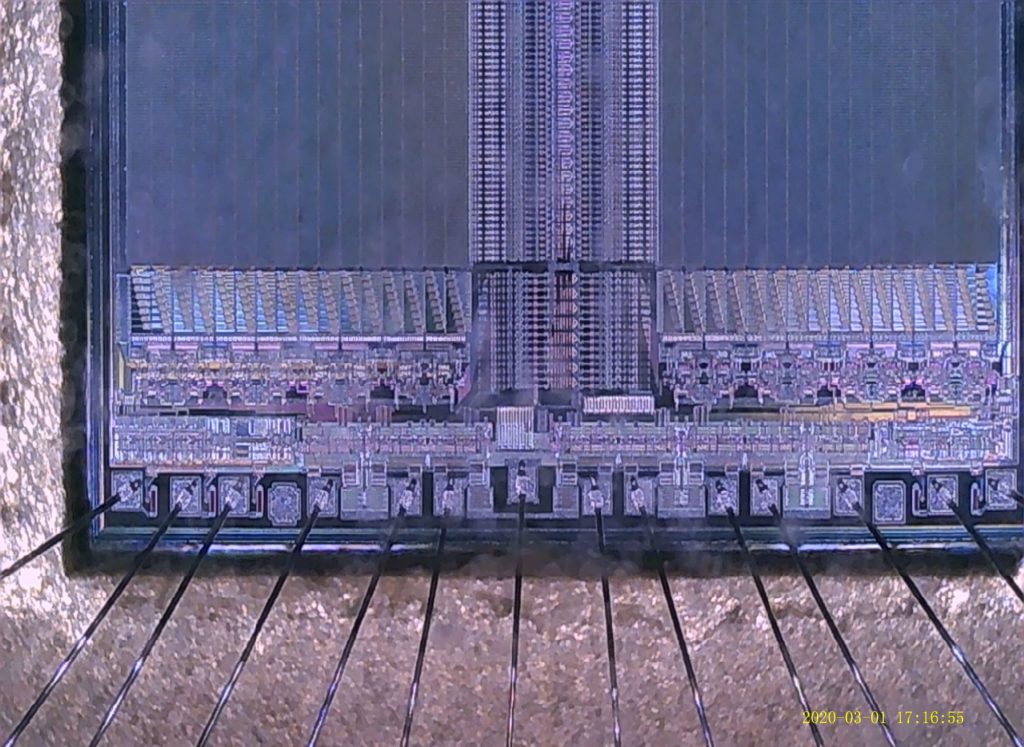
Medium zoom, focusing on the near edge of the same EPROM chip
Maximum zoom into the same EPROM chip, showing the binding pads and interface circuitry.
You can almost see individual transistors, if still indistinctly.
(Click for original image for this and the others.)

It’s not very helpful for soldering — at least, not for 0.1″ pins — that goes much faster just looking at them the old-fashioned way. As it is, though, it’s certainly worth $65 or so for an excellent digital magnifying glass. It’s great for board inspections; you can clearly see all kinds of details that you’d miss even with a nice traditional magnifying glass.

Just don’t believe all of the terms that they put in the product description. Here’s the truth:

  • LCD: Yes, it has a decent LCD display.
  • Digital: Check.
  • Microscope: Yes, if maybe not quite the 1000x zoom it claims. (See below.)
  • 4.3 inch: The display measures 110mm (~4.33″) diagonally (and uses it all). Check.
  • 1080p: No. It can do video over USB, but its maximum resolution is a (clear) 720p.
  • 10 Megapixels: It can produce 3840 x 2800, 24-bit .jpg files on the 10MP setting.
    So either it does take 10MP images, or at least it upsamples them to this.
  • 1-1000x magnification zoom: I was able to enlarge a pin measuring 580 microns
    across to roughly one foot across on my 45″ monitor.
    If you have a giant monitor, maybe 1000x??
  • Wireless: No. It’s “wireless” in that it has a Li-Ion battery, and
    can capture images and videos by itself. It needs a wired USB link for use with a PC.

    It doesn’t seem to have any kind of radio link like Wi-Fi, Bluetooth, etc.
  • USB: It can charge via Micro USB as well as act as a PC camera over USB.
    It can likely transfer pictures via USB, too. (So far, I’ve just used the MicroSD card.)
  • Stereo: This one boggles the mind. I think the video record feature also records audio.
    …Maybe they’re referring to this? It is NOT a stereo microscope. Not at this price.
  • Microscope: Yes; up to maybe 500x or so on a reasonably large monitor.
  • Camera: Yes.
  • 10MP: Maybe?
  • Camera video recorder: It does record video, although not at 10MP, of course.
  • with HD screen: Probably not. It’s probably 640×480 or something like that. It’s adequate.
The product description, from Amazon.

Bottom line: I’d buy it again. It’s useful enough, even if the claims are a little exaggerated.

Posted in Tools, Toys | Leave a comment

TTGO T-Display I2C pin location

You can’t always trust the datasheet.

The TTGO T-Display is a great little dev board, incorporating an ESP32 processor (with WiFi and Bluetooth support) and a small OLED display. With the header pins soldered on, it’s breadboardable — and even has a battery connector to use (and presumably charge) a small Lithium-Ion battery. Not bad for about $10.

Unfortunately, one effect of using such new technology is that the specifications sometimes change out from under you — and the firmware (let alone the documentation) takes a while to catch up. Production changes are made to solve problems, other changes are made that make these changes unnecessary, and then they’re reverted for only part of the system.

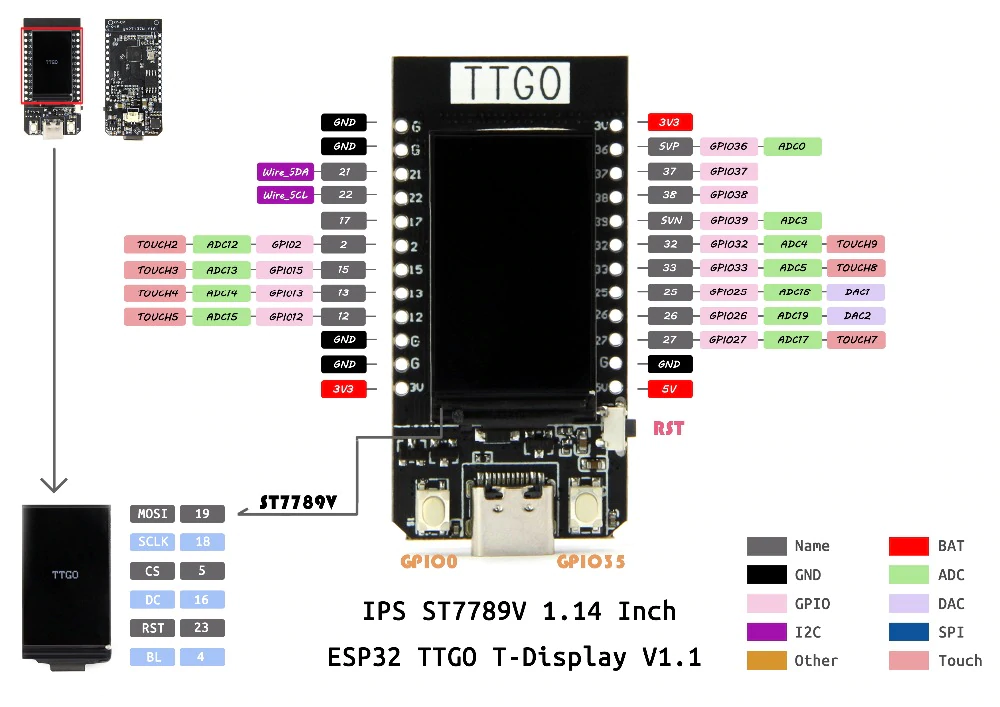
You’d think that something that breaks I2C would have been caught by now, though, especially when it’s a simple fix. Sometime in the development of the TTGO T-Display board (or a predecessor), an onboard LED was apparently placed on GPIO pin 22 (which serves as the SCL clock pin for I2C.) This LED was said to cause problems with I2C communications, so the solution was to remap SCL in the board definitions to pin 23 from pin 22.

The TTGO T-Display pinout, according to LilyGo.
Unfortunately, Pin 22 isn’t SCL. That’s defined as Pin 23…
…which isn’t brought out to a header.

Great — except nobody ever updated the pinout — or bothered to bring Pin 23 out to the header. A pin intended to connect to external peripherals is useless if it isn’t brought out to a pin where you can get it to the breadboard or external device.

A quick “Blink” clone test convinced me that nothing blinks when Pin 22 is made an output and toggled high to low, so most likely whatever LED was associated with Pin 22 was deleted long ago. Trying out SoftWire (a software-based I2C implementation) on pins 21/23 worked fine, clearing the way to change it back.

A quick Google search led me to the location of the pin definitions file for the T-Display board:

C:\Users\<user>\AppData\Local\Arduino15\packages\
esp32\hardware\esp32\1.0.4\variants\ttgo-t1\pins_arduino.h

SDA and SCL are defined just a few lines into this file. Once SCL was changed back to 22, the built-in Wire library started working. If I2C doesn’t work on your TTGO T-Display, this is why. Make the change to the file listed in bold above, and it should work.

I’d submit a pull request, but I can’t figure out who’s responsible for maintaining the ESP32 variant in the Arduino libraries. Searching through the TTGO T-Display Github doesn’t pull up any references to the SCL pin (only SCLK).

Posted in Arduino, C, Coding, Digital, Troubleshooting | Leave a comment

It from Blit

This is at least the second time I’ve stumbled across a Sierpinski Triangle.

Sometimes a bug turns out to be more interesting than the original intended result.

The above image was supposed to be a simple moving-sinewave test of bit blitting (moving most of the display and just drawing one new pixel per frame, to produce a rolling display.) Something clearly went wrong and somehow created a feedback-loop cellular automaton.

I did not expect to see a Sierpinski gasket here — but this actually isn’t the first time I’ve come across one unexpectedly. Back in high school, I wrote a program to draw the Sierpinski gasket on an HP plotter a friend had given me. That worked well enough (I think I still have the plot somewhere), but I didn’t expect the unrelated cellular automata I was playing with at the same time (on a different computer, outputting to a printer) to also draw it — outwardly fractal instead of inward.

It’s a pattern that seems likely to emerge from any of several different processes (I know of at least four ways of making this now, once I figure out what is going on with this latest version). Even Nature has joined in…

A seashell displaying cellular-automata patterns in its markings.
(Image from Wikipedia)

(The title is a play on and homage to John Archibald Wheeler’s “It from Bit” idea.)

Posted in BASIC, Coding, Fractals | Leave a comment

Coffin Corner

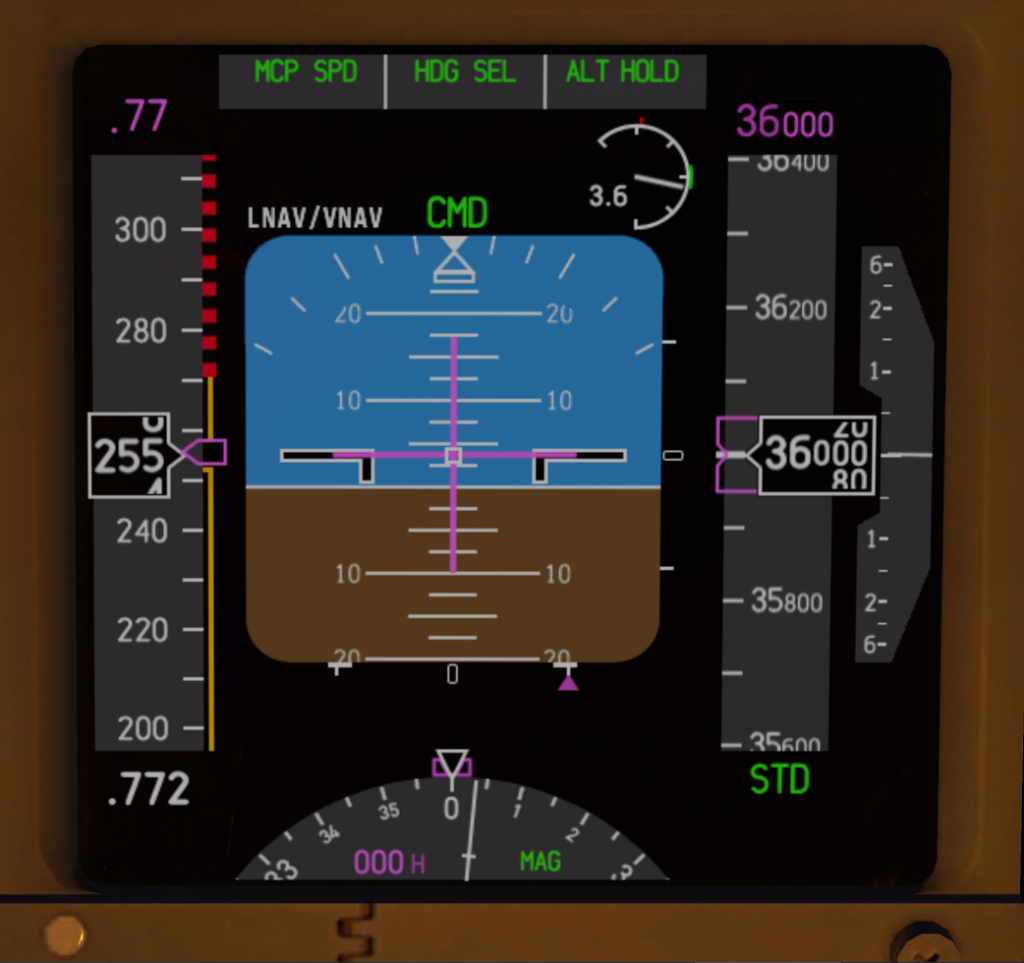
Fly high enough, and “too fast” becomes slower than “too slow.”

Planes are amazing things. With almost turnkey reliability, we can jump in a flying machine that can transport us at over three quarters of the speed of sound, over six miles in the air.

Like everything else, though, this amazing technology has its limits due to some basic physical laws. Wings require a certain minimum airspeed to generate lift — and you want to make sure that you fly somewhat faster than that, so the airplane keeps flying. At low aircraft weight, especially with flaps out, the minimum speed can be quite low — maybe only 120 knots or so.

There’s also an upper airspeed limit, too, of course. Dynamic air pressure increases as the square of the speed. On the 737-800, this is something like 340 knots indicated airspeed at sea level. We’re carrying a ridiculous amount of fuel on this test flight (a mission to find the magnetic North pole and also to see if a 220,000lb 737-800 can fly), so our minimum clean airspeed is higher than usual (the wing must generate more lift to offset the weight of the fuel.) This higher speed still isn’t anywhere near the maximum of 340, though, so we’re good to go, at least at first.

The problem is that there’s also a maximum Mach number. Fly faster than this, and shock waves can be set up that can cause instabilities or stresses. And the same Mach number happens at lower indicated airspeeds, with increasing altitude.

Eventually, the highest speed that the plane can safely fly dips uncomfortably close to the minimum speed required to keep it in the air. Welcome to “coffin corner.” Fly much faster, and the airframe is overstressed. Fly much slower, and the plane falls out of the sky.

The 737-800 flight shown above is still relatively safe (getting that heavy a 738 airborne, even from KEDW, was the tricky part). It’s stable now, and the minimum speed will decrease as fuel is burned off. Even now, it’ll probably still fly at 220ish without flaps. Were there to be a problem, the solution is to descend.

…Now to figure out where to land. I wonder if CYLT (Alert, Canada) is modeled?

Posted in Aviation, Science, Uncategorized | Leave a comment