Euclidean Construction

The other day, I had an unusual request at work. (Actually, unusual requests aren’t really that unusual around here, which is one reason why my job is generally pretty cool.) Part holders were needed for ultrasonic calibration blocks — and these blocks had a strange, nonlinear shape.

The calibration block in question. (Click for larger.)

Using calipers, I determined that the block was about 25.4mm (one inch) thick — and therefore, was probably calibrated in inches. The length of the top (hypotenuse?) measured right about three inches across, so this seemed to confirm the idea.

How to measure the diameter of the semicircles, though, since only a small arc of each was available? High-school geometry, and a few assumptions, provided the answer. Both arcs looked to intersect the top at a 90-degree angle, meaning that the center of each arc had to be somewhere along that line. For the larger arc, a chord can be constructed between the two endpoints. Taking the perpendicular bisector of this arc (with a compass and straightedge) provides a bisector of the arc. The intersection of this line with the top of the piece locates the center of the circle. It turned out to have a radius of two inches, and its center turned out to also be the center of the smaller arc (with a radius of one inch).

The final question was where to begin and end the arcs. Measuring the distance across the larger arc resulted in a length of very nearly two inches. Since this made sense (calibration blocks normally use nice round number measurements like this), I decided to treat this as exact. Using a virtual compass, I drew a third circle with radius two inches to locate the end point of the larger arc. Finally, I reasoned that the line segment from this point was tangent to the smaller circle, and added it accordingly.

The construction for the calibration block shape in Google SketchUp. (Click for larger.)

Now that the measurements were known, it was fairly straightforward to design a holder jig in Google Sketchup and send it to our 3D printer. Score one for high-school geometry!

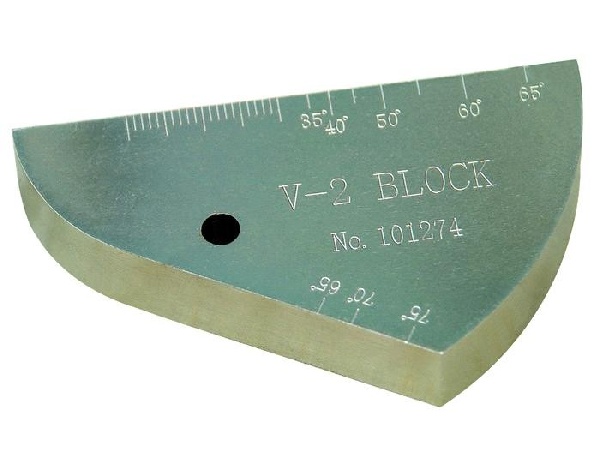
A Google SketchUp rendering of the holder. (Click for larger.)

Posted in Design, Drexel, Math, Reverse Engineering | Leave a comment

Sources for parts

Electronics is a fascinating hobby — but like most hobbies, it often requires parts and tools that can’t always be found at the local Wal-Mart or Target. Here, listed in rough order of preference, are a few of my favorite sources for electronics parts, development boards, modules, and tools, along with a description of the pros and cons of each.

Sparkfun
Sparkfun is pretty much my go-to source for electronics components, except bulk parts. Although their prices aren’t always as rock-bottom as some other sources, they always have a fascinating selection of components at reasonable prices, most of which are fairly well-documented and easy to integrate into projects. Sparkfun caters to electronics hobbyists, and they are deservedly known for their good selection of breakout boards, allowing hobbyists to easily use modern surface-mount components in standard 0.1″ spacing breadboards. In short, they “get” DIY electronics.
Adafruit
Literally started in her MIT dorm room by electronics guru Limor (“Lady Ada”) Fried, Adafruit Industries is not only a good source for components and dev boards, but an innovator, as well. Limor and her fellow engineers at Adafruit emphasize electronics education and DIY supplies, tools, and tutorials. Their projects and “merit badges” provide a good, fun way to learn more about electronics.
Digi-Key
Digi-Key is more of an industrial electronics supply house than a hobbyist-centric vendor. They’re known for their excellent selection, fast, reliable shipping, decent prices, and good documentation (datasheets and photos) for most parts that they stock. For large orders of industry-standard parts, they tend to be less expensive than hobbyist stores — although the reverse can be true with dev boards etc. If I needed a thousand 555 timer chips in SOIC form factor by tomorrow afternoon, Digi-Key would be where I’d look first.
Microchip
Microchip Direct is both my first stop for information on PIC microcontrollers, as well as the best place to get PICs quickly and inexpensively. Their prices are typically even better than their distributors’, and they’re known for their cheap and relatively fast shipping from their factory in Thailand. If you need a couple hundred 12F683s by next week, they can make that happen. They also stock other Microchip products, such as serial EEPROMs. Microchip also has a good sample program, providing sample quantities of many parts for a small handling fee or for free.
Jameco
Jameco is a discount electronics parts provider. They tend to have nearly as good a selection as Digi-Key or Mouser, but often with slightly lower prices. In my experience, they offer nearly as fast service as Digi-Key with a good selection. For a large order, they’re one of a few sites I keep in mind for price comparison. It’s not unusual to be able to save a few percent on an order vs. other suppliers, while still remaining confident that your order will be processed correctly and efficiently.
MPJA
MPJA is a fun site to browse; it reminds me of shopping at places like Grand Junquetion in Virginia Beach, years ago. MPJA stocks a few basic staples (their prices on 830-hole breadboards and jumper wire kits are outstanding), but apparently specializes in whatever their buyers found a great deal on recently. I’ve picked up toy motor assemblies for a dollar or two, 16×2 LCD displays for a few bucks, and an assortment of interesting, inexpensive tools. What you see on their site is what you get; I shop there periodically to find cool things I didn’t know I needed.
Radio Shack
Years ago, Radio Shack was THE local electronics store, selling their 150-in-one and similar electronics kits as well as cool gear like the PC-6 pocket computer. As a hobbyist store, they basically sat the 1990s and early 2000s out, carrying fewer and fewer parts and tools. Recently, though, they’ve begun to rejoin the DIY electronics movement, carrying better tools as well as Arduinos and electronics project kits. They’re also still just about the only way to get a 2N3904 transistor RIGHT NOW when FedEx Overnight is just too slow. It’s a pity their prices on components are so high.
Digilent
Digilent makes interesting, useful, and relatively inexpensive development boards for Xilinx FPGAs as well as various microcontrollers. Some of their innovations, such as their PMOD accessory modules, make prototyping with their boards much easier. In addition to the hardware, Digilent provides example source code for many applications.
eBay
Buying components on eBay is an art form, but the cost savings can be spectacular. Standard components such as LCD text displays can be found at significant discounts. If you need parts in a timely manner, though, you may want to filter by location; parts from suppliers in China can take several weeks to reach the US and clear customs.
Mouser
Mouser is another well-regarded electronics industry supply house. Their site is relatively easy to navigate, and once you drill down to the product category you want, they have a good filtering system to help you narrow their selection down to the best part.
Futurlec
Futurlec is a deep-discount Chinese supplier. They often have impressively low prices on components and tools, including some innovative ones (like an RGB LED array) that you might not see elsewhere. Shipping can take several weeks, though.
eDooMart
eDooMart often has insanely low prices on components, boards, and tools — for example, Bluetooth OBD-II modules for US$20. As is the case with many Chinese vendors, though, their website is sometimes hard to navigate and shipping to the US can be quite slow, sometimes taking a month or more for products to arrive. For such low prices, though, it can be worth it.

Disclaimer: I am not affiliated with any of these vendors, except as an occasional customer.

Posted in Analog, Components, Digital, Electronics, Resources, Reviews, Tools | Leave a comment

LEDs as input devices

LEDs are fairly straightforward to use — just put them in series with a current-limiting resistor and apply forward voltage to produce light of whatever color the LED is designed for.

What isn’t as well-known, though, is that LEDs can also be used as photodetectors, sensitive to the color of light that they emit. This is a somewhat nonstandard use of an LED, but requires no more components than a standard blinking-LED project — an LED, a current-limiting resistor, and a microcontroller.

The trick is to run the LED backwards, reverse-biasing it for a short time (a microsecond is more than enough) — then disconnect the input (tristating the microcontroller I/O pin), and time how long it takes for the voltage to be reduced to below the TTL low threshold. Some leakage current will flow across the LED even in darkness, lowering the voltage towards zero with a time constant on the order of perhaps a few hundred microseconds. When brightly illuminated with light of the correct wavelength, however, a much greater photocurrent will flow, lowering the voltage on the pin in a few tens of microseconds.

In practice, this allows for a fairly straightforward recipe for detecting bright light of the LED’s wavelength (or shorter):

  • Connect the cathode (negative lead) of the LED to an I/O pin
  • Connect the anode (positive lead) of the LED to Ground via a resistor
    (Yes, this is intentionally backwards from how LEDs are usually used.)
  • Program the microcontroller to do the following in a loop:
    • Enable the I/O pin as an output, and bring it high
    • Disconnect (tristate) the I/O pin (no delay is needed)
    • Wait for about 200us
    • Do a (digital) read on the I/O pin
    • If the pin is low, the LED is receiving bright light.
    • If the pin is still high, the LED is in relative darkness.

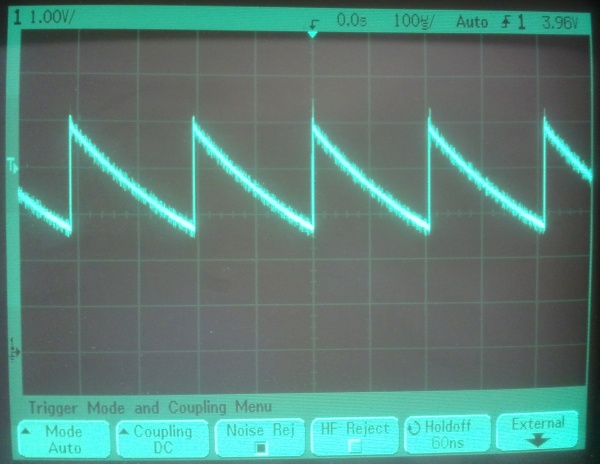
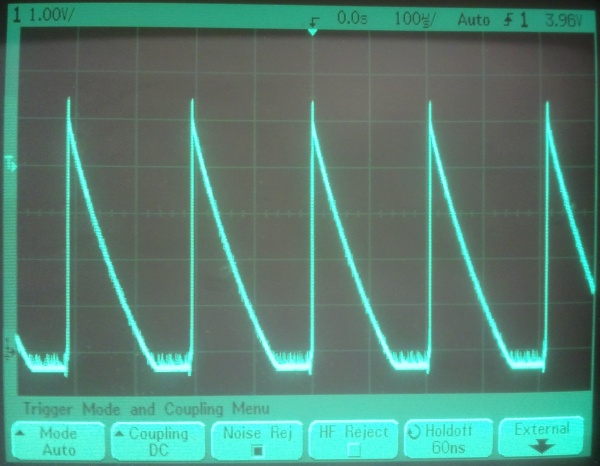
The difference in the discharge curves is easily seen on an oscilloscope…

The discharge curve under ambient light. (Click for larger.)

The sharper discharge curve when illuminated by a laser pointer. (Click for larger.)


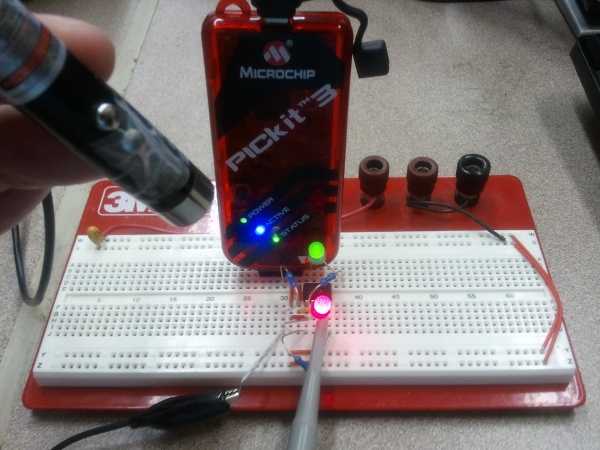
Here’s the setup I used for testing. A PIC12F683 is used to provide the initial 5V pulse. The PIC then waits for 200us and reads the TTL value on the I/O pin. If it is low (meaning the LED is illuminated), it turns on the green LED via a second I/O pin. If it is high (meaning the LED is relatively unilluminated), it turns the green LED off.

The experimental setup. A laser pointer illuminates the red LED, causing it to discharge quickly. The PIC measures this and turns the green LED on. (Click for larger.)

Posted in Components, Digital, Electronics, Hacks, HOW-TO, PIC Microcontrollers | Leave a comment

TTL debugging techniques

It happens all the time, even to experienced professionals. You wire up a digital logic circuit, but it doesn’t work the way you expect. Here are some of the most common reasons why a digital circuit might not work, along with tips on how to diagnose the problem.

Check the chips’ power…

  • Is the proper power supply (typically 5VDC) connected to each chip?
  • Is Ground connected to each chip? Is it at 0VDC?
  • Are power and ground connected to the correct pins?
  • Is the power reasonably clean? (Check it with an oscilloscope.)

Check for common wiring mistakes…

  • Are any pins on the chip left unconnected? If so, should they be?
  • Are any of the chip pins bent underneath it, instead of making contact?
  • Are enable pins connected and tied to the correct value?
  • Are any outputs shorted together? (This is a Bad Thing™)
  • Are any outputs tied to power or ground?

At this point, take a logic probe and start tracing signals on chips that seem to be misbehaving. Follow the “contract model” of diagnosis: You provide power, correct signals, correct power, and an output of sufficiently high impedance, and the chip performs the correct function. If it doesn’t, and your conditions are OK, replace it!

Posted in Design, Digital, EET205, EET325, Electronics, HOW-TO | Leave a comment