NeoPixels

“Civilization advances by extending the number of important operations which we can perform without thinking about them.”

–Alfred North Whitehead

More interesting components make for more interesting devices. This is certainly the case with one of Adafruit Industries’ latest creations — the NeoPixel.

NeoPixel (breadboardable version) (Image: Adafruit.com)


The idea behind NeoPixels is both simple and brilliant. Make a true-color RGB LED as easy as possible to drive with a microcontroller. Normally, in order to get full color from a RGB LED, you need to send PWM signals to the three signal pins. Controlling this on a small microcontroller with limited resources can be demanding, leading to design compromises like using only the eight basic steady-state RGB colors or only flashing the color intermittently, when the processor has nothing better to do.

With NeoPixels, the PWM functionality has been offloaded onto the LED. NeoPixels have a four-wire interface — and that’s counting ground, power, and signal out. Now running a full-color LED only takes one wire, and takes far less of the processor’s attention. Instead of continually monitoring the RGB pin states, the CPU sends a new color whenever it changes, and goes about its business (or goes to sleep) at other times.

Adafruit has an excellent “Uberguide” to everything NeoPixel. Load an Arduino library or two, and two or three lines of code later, you have color. Interfacing with a PIC is almost as easy once you have a few bit-banging routines written.

NeoPixels can be daisy-chained, too. The signal-out pin of one connects to the signal-in pin on the next one. There’s no practical limit to the number that can be chained this way, if you don’t mind the latency and distribute power and ground. Once a NeoPixel has received its twenty-four bits, it sends all subsequent bits down the line. So the first three bytes sent control the first NeoPixel in the chain, the second three bytes control the color of the second, and so on. (The NeoPixels don’t know and don’t care if anyone is listening downstream, which makes interfacing easy but doesn’t allow for verification.)

They come in single units, strips, rings, panels, and now they’re even available in 5mm and 8mm through-hole.

I love living in the future.

Posted in Arduino, Components, Design, Digital, Electronics, PIC Microcontrollers, Reviews | Leave a comment

2D, 3D printing

A 3D printer is, ultimately, a gantry system. It normally uses this setup to position a plastic extruder to make parts — but it can be used for many other tasks, as well.

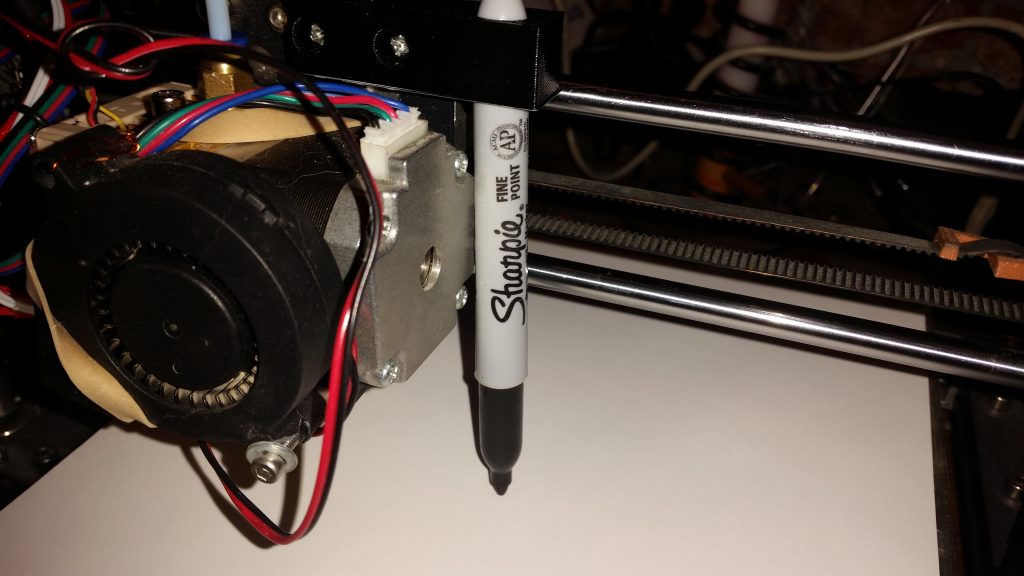
As a preliminary test of this functionality, I printed a bracket to hold a Sharpie, to try drawing with the printer in 2D. With the right G-code commands, the printer can be turned into a plotter. (It should even be fairly straightforward to arrange a pen-swap mechanism; HP had this on their plotters decades ago.)

The Sharpie in place, ready to start plotting.

Before testing with the pen in place, I wrote a custom .gcode file to check the printer’s behavior. If a new file was sent to the printer, would it home itself before printing (which would not work well with the pen mount)? The file consisted of a single command:  G0 X100 Y100 F1200. This is a command to move the gantry to (100,100,Z) where Z is the current, unchanged, Z position.

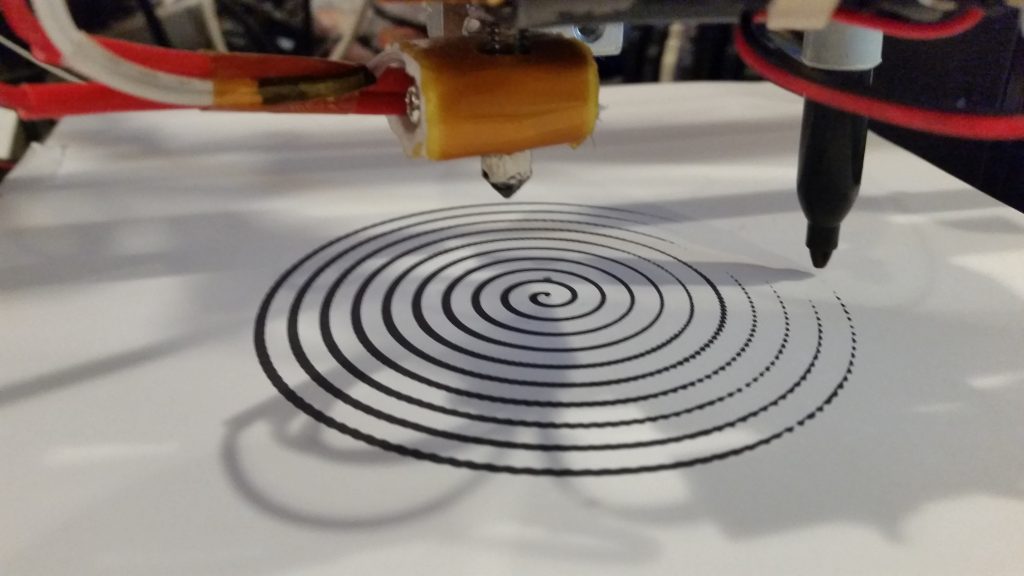
It worked — meaning it didn’t reset the Z position which would crash the pen into the bed — so the next step was to create a more complex 2D G-code file to draw an Archimedes spiral.

An Archimedes spiral, given by R (in mm) = 5*theta/(2*pi). (Click for larger.)
Make sure your pen stays below the nozzle!

Here is a link to the bracket on Thingiverse, if you want to try this yourself.

The relevant G-code command is G0 (with a zero, not o). Here’s the syntax:

G0      Rapid linear move X### Y### Z### E### F### (mm/min)

So, a G-code file to draw a square might look like:

G0 X100 Y100 Z23 F1200 ;Start at (100,100,23) just above the paper
G0 X100 Y100 Z21.5 ;Pen down — your height will vary.
G0 X100 Y150 F1200
G0 X150 Y150 F1200
G0 X150 Y100 F1200
G0 X100 Y100 F1200

Happy plotting!

Posted in 3D Printing, Coding, HOW-TO | Leave a comment

Polyphonic Music On An Arduino

Arduino Unos are cool, useful little dev boards with built-in functions for nearly everything. Arduino C even includes a tone() function, which can be used to generate square waves of a given frequency on a specified pin.

With the right note-to-frequency table, these tones can be made into music. There’s a drawback, however — the Uno can only handle one tone() output running at once. If you need to play E4, you have to stop playing C4 first.

There are several ways around this, ranging from using wave or mp3 shields to software-only approaches. By far the cheapest an easiest (no additional hardware components) is to arpeggiate the chords, playing the notes rapidly in succession. This tricks the ear into hearing a chord, even though all of the tones are not present at the same time.

Here are some Arduino C functions to help automate this, along with an example application that plays the first part of the Super Mario theme. The functions handle switching between notes as well as the timing. (Copy and paste the code as a complete Arduino sketch.)

Here’s where I found the sheet music for the Super Mario theme.
(I don’t recommend reading the description; it’s a word salad of English words, and looks like it was written by a stochastic Markov process.)

Yet to be done:

  • Update tempo to be modifiable, specified in beats per minute (BPM);
  • Tweak the timings for best sound and consistency;
  • Bozo-check the input to make sure note values are valid
  • …and maybe find the rest of the sheet music.

Share and enjoy! (code is CC-BY-NC)


Posted in Arduino, C, Coding, Digital, Music | Leave a comment

“Disconnect-Me-Not” Light Switch Cover

Over the past several months, I’ve been implementing several Smart House upgrades at my place — starting with the lighting. Philips Hue (and similar products) allow for many different lighting possibilities, many of which we’re only beginning to explore and create.

Network-connected LED lights can be locally or remotely controlled, turning on or off in response to motion sensors, fixed or semi-random schedules, remote switches, API interactions, Alexa commands, and more. Rather than turning on lights when entering a room (and having to remember to turn them off), motion sensors handle this. Done right, the light simply follows you around.

In addition, vacation lighting can now be a lot more natural, following your usual patterns to make the house look lived-in. Add in the full spectrum color changes of the white-and-color lights, and the possibilities are pretty amazing. (You could, for example, program your lights to lead guests on scavenger hunts and such — or turn blue to let you know it’s about to start raining or flash if someone is at the door etc.) And there’s a nice, useful, publicly-available API so you can write programs to control it all.

There’s a (minor) catch. All of this functionality requires the bulbs to be continually powered. The individual bulbs are now independent computers controlling that light fixture. For them to accept commands, the AC power needs to be on at all times. If someone turns off the physical switch to the bulb, your fancy smart new RGB lightbulb becomes a dumb old darkbulb until someone goes and flips the switch back on.

Humans are forgetful (and guests may not know better); partially covering the switch would keep it from being turned off inadvertently, while still allowing control of the physical circuit. (Sometimes the quickest way to turn on a light is to power-cycle it, since they default to on-full-bright.)

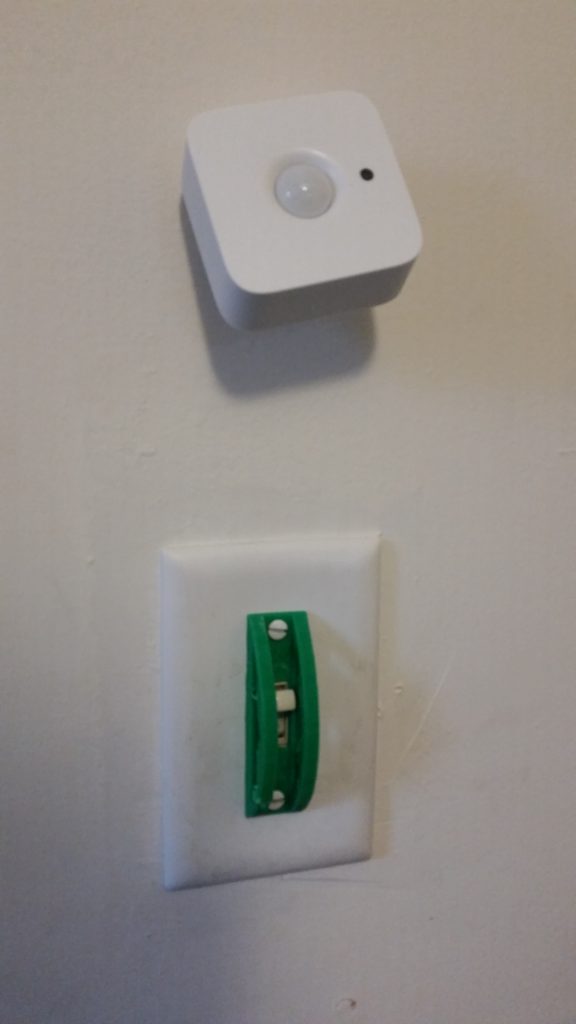
So after a few design iterations to get everything to fit, I came up with a model for a 3D printed light switch cover. It’s resistant to casual swipes at the switch to turn it off as you leave the room, but still allows the switch to be worked, if that’s what you’re really after.

Here’s the Thingiverse link. Share and enjoy!

A guarded switch underneath its related motion sensor (aimed up to trigger for humans but not cats).

Posted in 3D Printing, User Interface Design | Leave a comment