Recursion

“To know recursion, you must first know recursion.”

(Original author unknown)

Much of the fun of writing code is learning about all of the various algorithms and techniques that help get the job done. Some of these are relatively straightforward: if (this), then (do that); while (this is true) then (keep doing that), and so on.
It’s what makes the magic work.

One of the more interesting techniques is recursion. Analogous to mathematical induction, recursion involves using the function being written in part of its own definition. This sounds not only unintuitive but unsound — but it turns out to be mathematically rigorous.

Computing factorials is a straightforward task that can easily be done either recursively or non-recursively. X factorial, written as X!, is (for integers) the product of all integers from 2 up to X. So, 5! == 5 * 4 * 3 * 2, or 120. (Factorials get large very quickly.)

Writing a FOR loop is one way of computing the factorial (and probably the best way, since recursion doesn’t buy you much here). To implement this, you would simply multiply the integers between 2 and X, inclusive:

int factorial(int num){
    int n, result=1;
    if(num < 2){return(1);}
    for (n=2;n<=num;n++){result *= n;}
    return(result);
    }

This works well and doesn’t have the overhead associated with recursive calls, so it’s efficient, as well. A recursive approach, while less efficient, is instructive — especially since it’s so concise:

int factRecurs(int num){
    if(num < 2){return(1);}
    return(num * factRecurs(num-1));
    }

You could even make it a one-liner, using the ternary operator:

int factR(int num){return((num<2) ? 1 : num*factR(num-1));}

That’s it. That’s the algorithm. We tell it how to handle the factorial of 1 (or less), then how to handle N!, given that we know how to compute (N-1)!. It feels like cheating, but it’s sound.

If factRecurs(3) were called, for instance, it would call factRecurs(2), which would call factRecurs(1), which would return a value of 1. factRecurs(2) would then multiply this by 2 and return it to factRecurs(3), which would multiply it by 3 and return the correct answer: 6.


The “Towers of Hanoi” puzzle is probably the best-known “poster child” problem for recursion. There is a nonrecursive formula, but it’s unintuitive.

“Towers of Hanoi” is a puzzle consisting of a stack of discs of increasing diameter, and three piles in which they can be placed. The puzzle starts out with the discs stacked in order from largest to smallest in one pile; the goal is to move them to another pile, by moving only one disc at a time and without ever stacking a larger disc on a smaller one.

A wooden, 8-disc Towers of Hanoi puzzle. (255 moves to solve.)
(Image credit: Wikipedia)

The optimal solution, produced by the recursive algorithm, takes 2^N-1 moves for a pile of N discs. (One move with one disc; three moves with two; seven moves with three, etc.) Surprisingly, a pile of any size can be moved according to the rules, given enough time.

The recursive algorithm may not be obvious at first, but once it is understood, it almost feels like cheating — yet it works. The base case is, of course, moving one disc. If our function is called to move one disc from one pile to another, it simply prints out that move. (We could include a move legality check, but as it turns out, we won’t need to.)

The question arises of what to do when presented with more than one disc to move. The recursive Hanoi algorithm’s answer to this is that this is really the same problem we’re trying to solve, so we will just assume we know how to solve it!

The recursive case of moving N discs from A to B goes like this:

* Move N-1 discs from A to C;
* Move one disc from A to B;
* Move N-1 discs from C to B.

It seems too simple to work — somewhat like Douglas Adams’ story of how the Infinite Improbability Drive was created by someone simply figuring out how improbable it would be for one to appear, then giving a Finite Improbability Drive a cup of really hot tea. It shouldn’t work — but it does. (And it’s mathematically correct.)

And it turns out the Towers of Hanoi solution is even related to Sierpinski triangles.

Posted in Algorithms, C, Coding, Math | Tagged , , , , | Leave a comment

Large Graphics Using FreeBASIC

FreeBASIC is a fun language for playing around with algorithms. You can do a lot with it, but it’s still lightweight enough that a few lines of code are sufficient to start doing what you want.

I recently discovered that FBIDE will work with 64-bit versions of fbc.exe (the FreeBASIC compiler), so even the 32-bit memory limitation is a thing of the past. Arrays and other structures can now be as large as system memory permits.

Every new expansion of capabilities, however, always leads to discoveries of new limitations and questions about how to circumvent those. The next natural limitation I came across was working with graphics files the same size as or larger than the available screen real estate (1920×1080, in my case, less a bit for the window widgets.)

As it turns out, though, FreeBASIC has this covered, as well. All of the graphics routines (pset, line, circle, etc) can work with memory buffers as well as drawing directly to the screen. (After all, the screen buffer is itself just a block of memory.) All you need to do is create an image buffer of the appropriate size using ImageCreate, and then draw to this using the usual commands.

It seemed to me that it would be nice to both draw on the screen and to a scaled-up buffer with a single command, so I wrote some routines to do that. (There’s a file link below the examples.)

Saved from the screen buffer.
Low-res (800×600)
Higher-res (1600x1200 here), saved from the high-res image buffer. This isn't displayed on the screen, and so can be made more or less arbitrarily large.
High-res (1600×1200 here, but could be made as large as memory permits)

Share and enjoy! (CC-BY-NC-SA)

Posted in BASIC, Coding | Leave a comment

Homemade Capacitors

Capacitors, the electronics textbooks would have you believe, are very simple devices. In their most basic form, they consist of two conductive surfaces separated by a thin dielectric (insulating) material.

Various different materials have been used over the years, from air to paper to tantalum and many more. One popular choice for dielectric material is mica (which is also used for heatsink insulators, since it conducts heat but not electric current.)

“Mica” capacitors have been made using metal deposition for decades at this point — the capacitors are much more reliable and stable this way — but the original mica capacitors from the early 1900s were simply pieces of mica clamped between two metal plates.

I don’t have the necessary equipment to attempt metal deposition, but old-school clamped mica capacitors don’t require very much in the way of equipment. The secret ingredient, of course, is the mica. While on vacation in Maine last month, I came across a large specimen for sale that looked like it might produce nice, clean sheets.

A chunk of mica, as it might be found in nature. (Click for larger.)

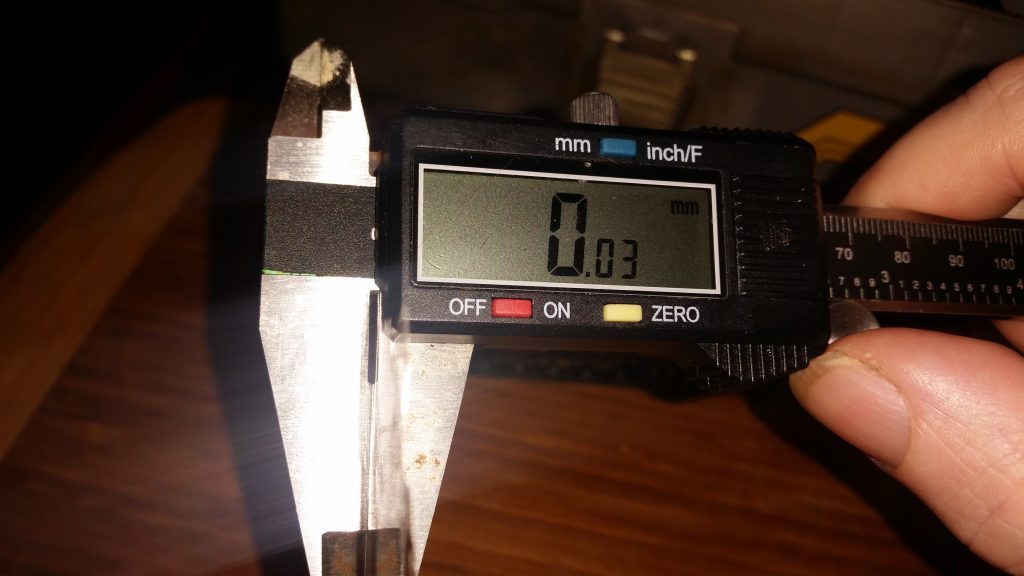
This is one of the nicest pieces I’ve seen. I don’t feel too bad about experimenting with it, though. The reason mica works so well as a dielectric is that the individual sheets are extremely thin — so very little is needed. (Single sheets from this one seem to be about 20-30um in thickness, although this is on the edge of what I can measure reliably with digital calipers.)

30um thickness, to something like one sig fig or so…

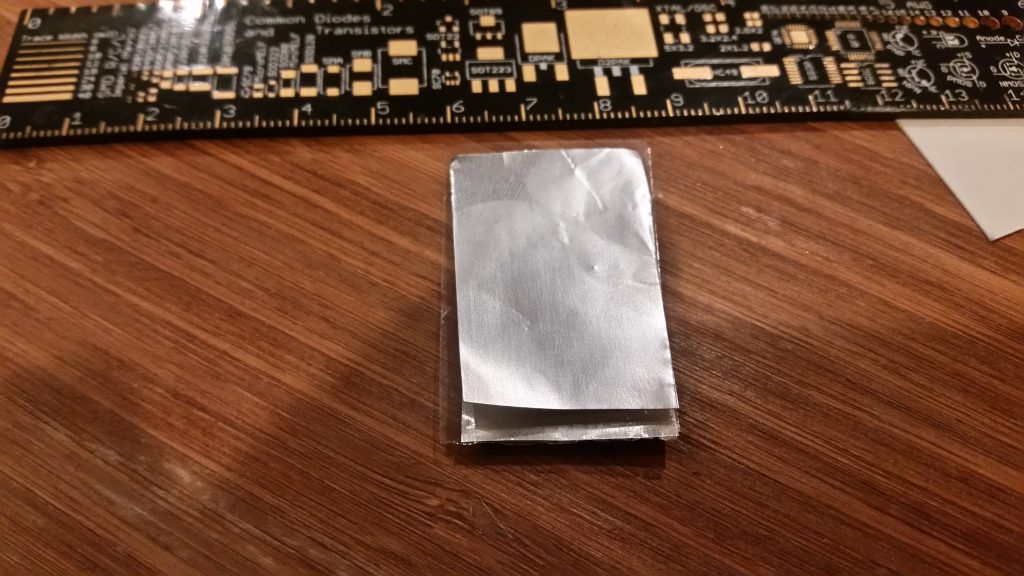
Using a razor blade and some patience, I was able to lift a layer of mica from the chunk. I then cut it to a roughly rectangular shape. Next, I made a template from an old business card that was slightly smaller than the piece of mica. I used this template to cut two pieces of aluminum foil, making sure they were slightly smaller than the piece of mica.

A single layer of mica (more or less). Click for larger.

The next step was to sandwich it all together. I used more pieces of business card to insulate the outside, allowing the use of alligator clips to clip on to the mica. I then connected the jumper cables to a component tester.

The inner part of the sandwich. The two metal plates must not touch.

The verdict: It works! The component tester shows a capacitor of roughly 80pF (and shows no component when one of the wires is disconnected at the cap.) The capacitance doubles to ~160pF when I hold on to the paper insulation — and almost quadruples again, increasing to nearly 600pF, when I squeeze it together. Time to 3D print a compression jig!

It works!

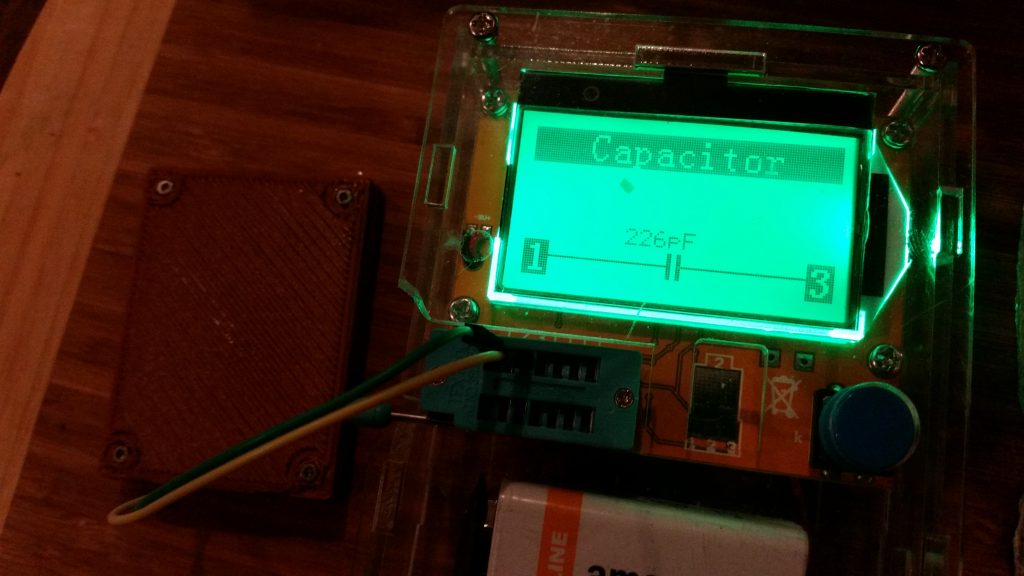
After printing a simple compression frame, the capacitor ended up at about 214pF. This is less than when I was holding the leads — but it’s more consistent and a lot more reliable this way, even with a very simple frame.

A working, 220pF-ish capacitor.

Strips of metal, interleaved with sheets of mica, might help it get up into the nF range. But that’s a project for another day.


Posted in 3D Printing, Analog, Components, Electronics, HOW-TO, Mad Science, Science, Uncategorized | Tagged , , | Leave a comment

Unity

Engineering gets easier every year because of all of the amazing tools that become available. Years ago, if you wanted to do a good physics-based simulation, that meant months of development work and probably several headache-inducing conversations with specialists about forces, free-body diagrams, vector calculus, and other topics.

Today, modern physics simulations exist for little or no cost* — and they’re getting easier to use all the time. I’ve recently started working with Unity — a development environment primarily aimed at game development, but which has many generally useful capabilities.

Most importantly for my purposes, Unity has an excellent, easy-to-use physics simulation package built in. Here is a video of a quick demo I wrote in the course of an evening while teaching myself the basics of Unity.

Such a simulation requires an insane amount of computing power. For each block generated (Unity generates a new one with each video frame), forces from each collision must be calculated and applied to the relevant objects. Simply modeling one cube falling while not perpendicular to the table would be challenging enough — you would need to calculate the time and position of first impact, adjust the time of the simulation accordingly, and predict forwards from that until the next collision.

Fortunately, Unity makes all of that very easy (for the programmer). With a few lines of code, objects are instantiated and set into motion. The built-in collision detection and physics routines and the 3D renderer handle the rest.

Here is the code to generate a brick. This command is automatically called at the start of every frame:

Instantiate(Brick, new Vector3(8 * Random.value - 4, 10, 
8 * Random.value - 4), Quaternion.identity);

This code instantiates (creates a working copy of) a Brick object, at 10 units above the table and somewhere from (-4-,4) and (4,4) on the X/Z plane. So each frame, a brick will appear above the table within four units left-right and within four units forwards-backwards from the origin point at the center of the table.

From here, Unity’s magic takes over. A few more lines assign the size and color of the brick and give it a random 3D rotation. From there, the physics engine handles things completely automatically.

A “cull” script does remove any objects which fall off the table, to keep the overall number of objects limited to a finite number.

Next stop, powered hinge joints and robotics simulations!


* Unity has a very friendly pricing model — completely free for individual use and organizations under $100k in funding or annual income; $25/month for hobbyists and small businesses, and $125/month for larger ones.

Posted in C, Coding, Games, Tools | Leave a comment