Minecraft, Printed

Minecraft is pretty much Virtual Reality’s take on LEGO. Build whatever you want, in 1m x 1m x 1m cubes. In Creative Mode, at least, resources are unlimited and the world is large enough that it might as well be infinite, at least in the four cardinal directions.

It’s a fun world for building whatever you want. And with a few conversion tools, you can bring what you build in Minecraft into the physical world. The process is still somewhat experimental, especially with single-material 3D printers, but it works.

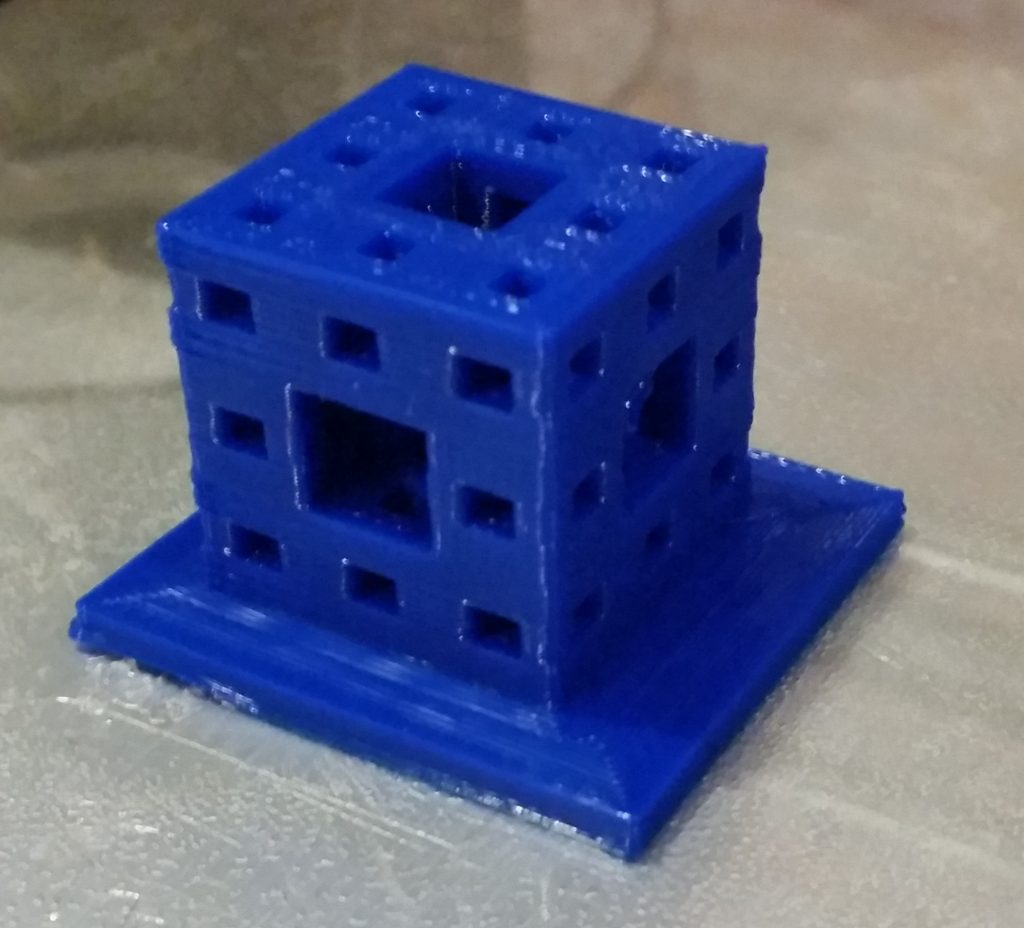
A 2nd-level Menger Sponge, made in Minecraft.

Here’s the process:

  • Download and install Mineways (it’s a portable app.)
  • You’ll need the Java Edition of Minecraft — the Windows 10 Edition seems to use a different world format that Mineways doesn’t understand.
  • Create whatever you want to print in Minecraft. It may be easiest to start in Creative Mode in a Superflat world. Then again, Normal worlds do look more natural.
  • Move your avatar to a recognizable point near your creation.
  • Save and exit your Minecraft world (you don’t have to exit the game.)
  • Open Mineways and import your world.
  • Press F3 to Jump to Player.
  • Locate your object or objects to be printed (you can drag the view around with the mouse and zoom with the Page Up / Page Down buttons)
  • Right-drag to select a rectangle containing what you want to print.
  • Press Ctrl-P and fill in the options you want.
  • Mineways will export your slice of Minecraft as an .stl file.

Remember that not everything that you can make in Minecraft can necessarily be printed. (After all, we’re talking about a world where rock can float in midair.) Remember not to make large overhangs past 45 degrees, or you’ll need to include support material.

A village as seen in Minecraft and (poorly) printed in PLA. (Click for larger.)

Happy ‘crafting!

Posted in 3D Printing, Design, Games, HOW-TO, Minecraft, Toys, Virtual Reality | Leave a comment

Candles Made Dangerous

DISCLAIMER: This experiment involves rather a lot of fire, and could cause a lot of damage or harm if not done properly. This information is provided for educational purposes only. Do not try this unless you know what you’re doing. Kids, get your parents’ permission (and help) before you do this. Have a plan to safely extinguish it, and a fire extinguisher in case that plan fails.

The image of a candle usually brings to mind serene, romantic images — candle-lit dinners, candles in the window of homes from yesteryear, and life in general as it was a century or more ago — a more peaceful and relaxed era.

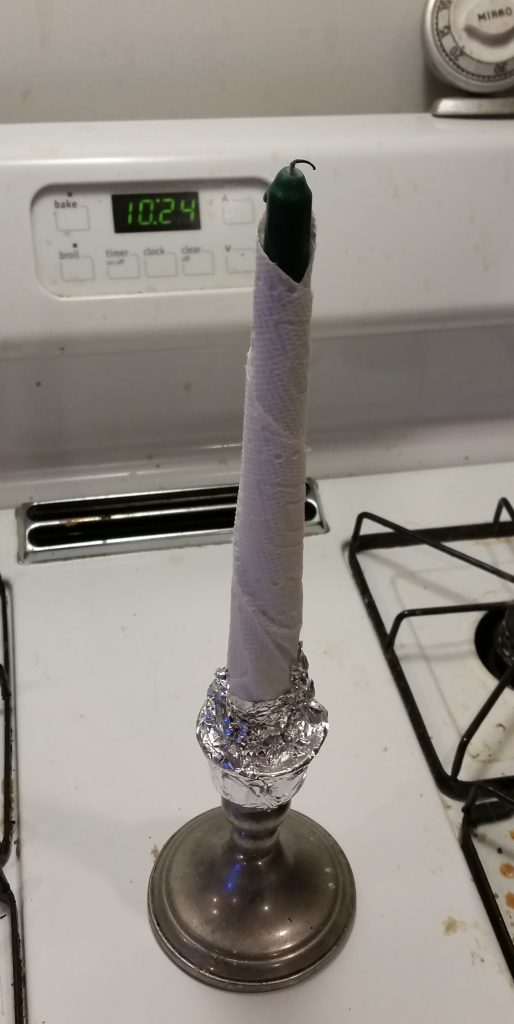
A nice, romantic candle. Let’s upgrade it!

To an engineer, though, a candle is fundamentally a machine for combining oxygen (air) and fuel (wax) through the process of combustion. Normally, this is a nice, regulated process, and the candle provides a calm, relaxing glow for several hours.

…but what if it could be “overclocked”…?

We have plenty of oxygen — it’s in the air. We also have plenty of fuel available — if perhaps not yet in the correct form for high-speed combustion. What we need is a way to combine these more quickly.

Wrap the candle tightly in a paper towel. Ideally, the towel should extend up to the top. (I’m not very good at this yet.)

Wrapping a paper towel tightly around the candle allows it to act as a wick — one with a much larger surface area than the candle’s original string wick. When the paper towel is lit, it heats up the wax next to it, melting it and causing it to flow into the unburned portion of the paper towel. From there, the same wicking action normally at work in the middle of the candle converts the entire outside of the candle into one big combustion zone.

Power equals Energy, divided by Time.

Have fun — but stay safe!

Posted in DoNotTryThisAtHome, Hacks, Mad Science, Science | Leave a comment

Virtual Glasses

Virtual Reality, as presented by the Oculus Rift CV1 headset, is amazing. With two separate displays and the right optics and postprocessing, modern PCs can not only display amazing renderings of 3D scenes on a 2D screen — they can truly immerse you in the scene. Move your head to the right, and your view changes. Turn and tilt your head slightly left and back, and what you see tracks your movement perfectly. Look over your shoulder, and you’ll see what’s there. No 2D picture or video can really describe it adequately. It’s like being there.

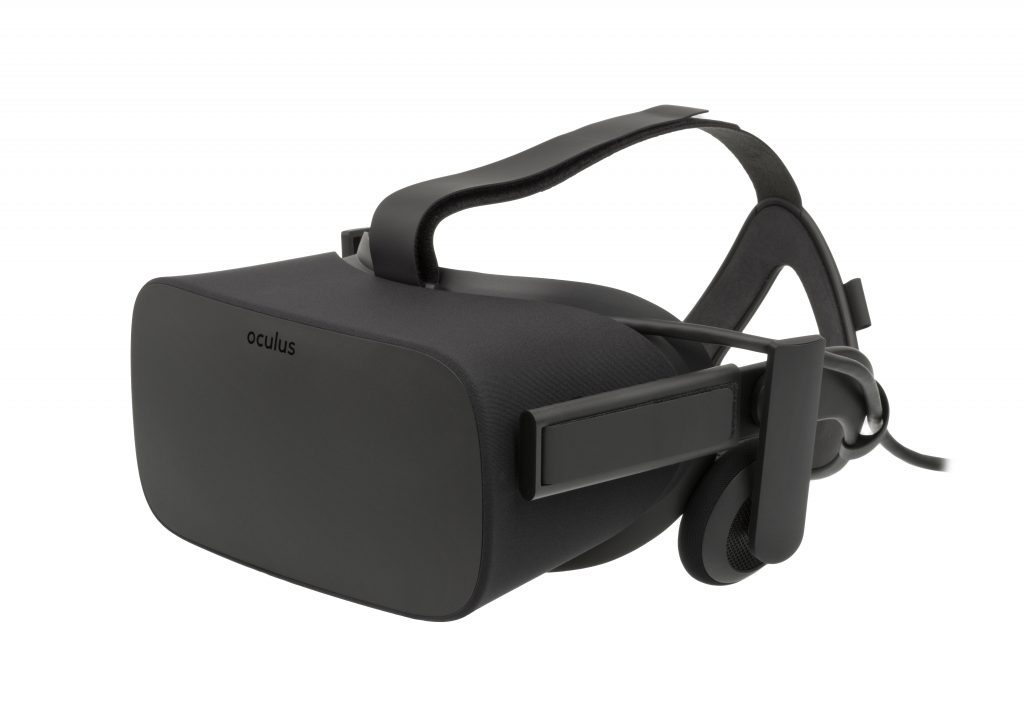
Oculus Rift CV1 headset. (Image from Wikipedia; click for larger version)

The illusion is particularly uncanny in Flight Simulator. To an experienced Flight Sim enthusiast like me, the Rift is literally like opening a second eye that you never had before. Suddenly, everything is in true 3D. You no longer have to guess how far away the runway is — your eyes do the calculation for you. The dashboard is right there in front of you. If you position your setup right, you can even get it to match where your (real) control yoke is. The illusion is very convincing.

However, those amazing, super-realistic 3D images — are optically projected at infinity. The Rift is amazing, but it’s not yet advanced enough to truly simulate optical depth, other than by parallax. Your brain quickly fills in the details — but if you have trouble seeing distant objects in real life, you’ll have the same problem in the Rift.

…So I learned that I’m nearsighted in VR, as well as real life. It figures.

Fortunately, there is now a fix! Thanks to the existence of online optical shops like Zenni Optical, and the very welcome work of Thingiverse user [jegstad], you can order prescription lenses for your CV1. Here’s how.

First, grab a copy of [jegstad]’s adapter from Thingiverse. This is an .stl file, which can be sliced and printed by just about any 3D printer out there. (This model is a pretty easy one to print, I found.)

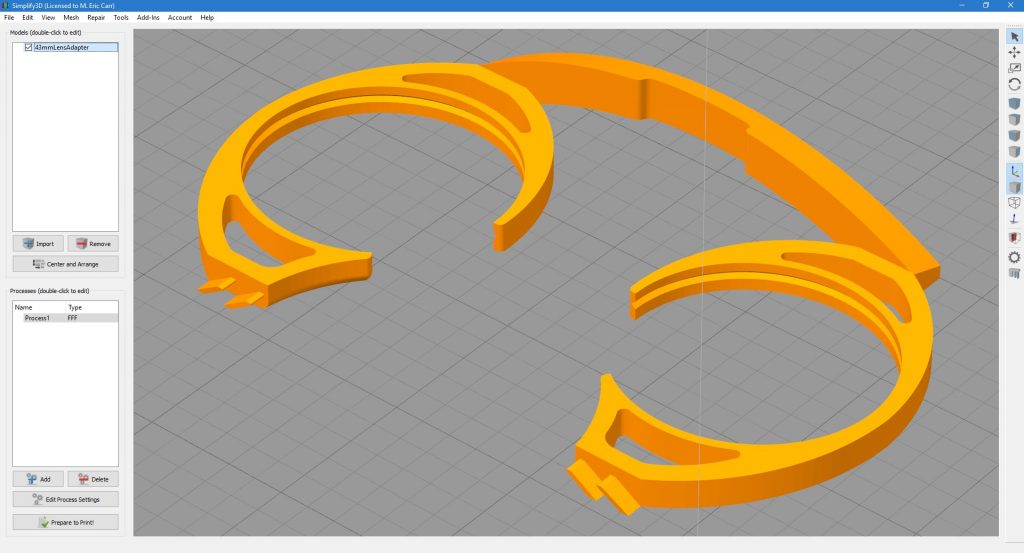
[jegstad]’s lens holder for the CV1, ready to be sliced in Simplify3D

Next, you’ll need a copy of your distance-glasses prescription. Go to Zenni Optical, and order frame #550011. Color doesn’t matter; we won’t need the frame at all where we’re going. We’re after those nice, circular 43mm prescription lenses it holds.

Pick the options you want (you don’t want tint for these, but the oleophobic coating is probably a good bet to avoid smudges) and order the frames.

When the frames arrive, remove the lenses (remember which is which, if it matters for your vision like it does mine). They can be snapped into the printed frame. Note: If you have astigmatism (anything other than zero in the “CYL” category), make sure you mark down not only which lens is which, but which orientation they’re in, since you’ll need to transfer them the same way.

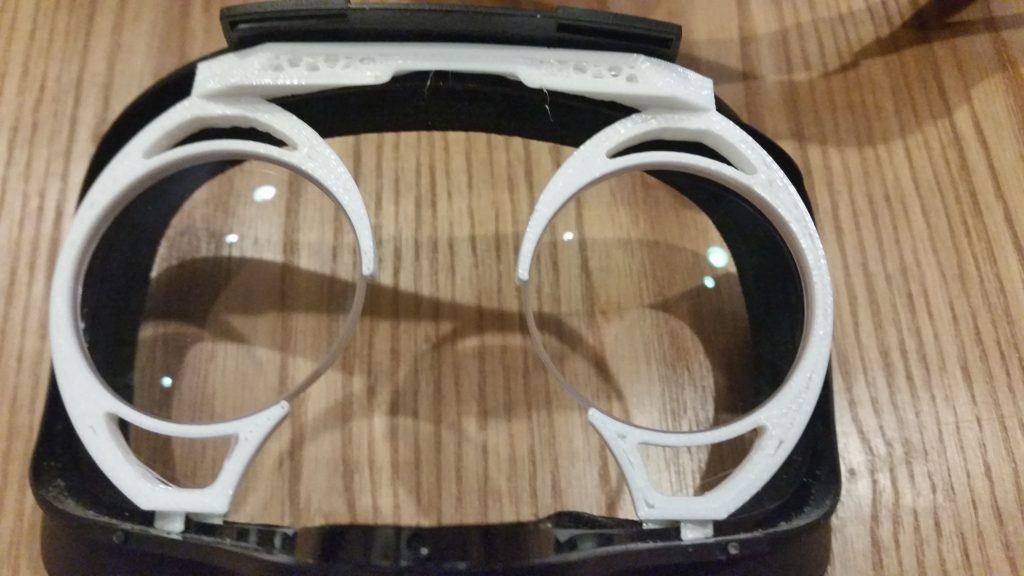
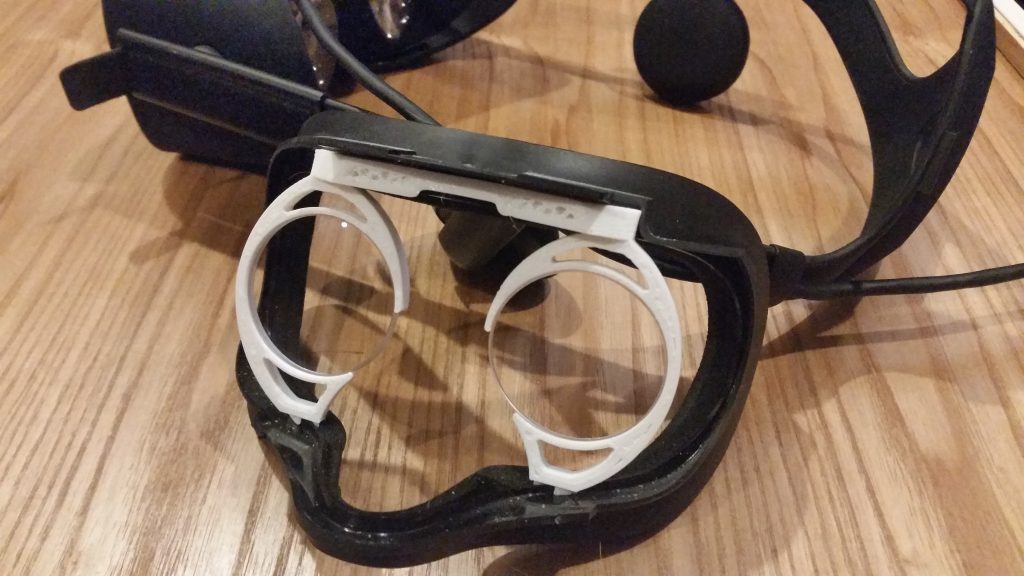
Next, carefully remove the foam visor from the CV1. The lens holder will clip right in. (It looks questionable but will seem more secure once in place.)

The 3D-printed lens holder, clipped to the Oculus’ visor insert.

The Oculus visor insert with the lenses in the holder


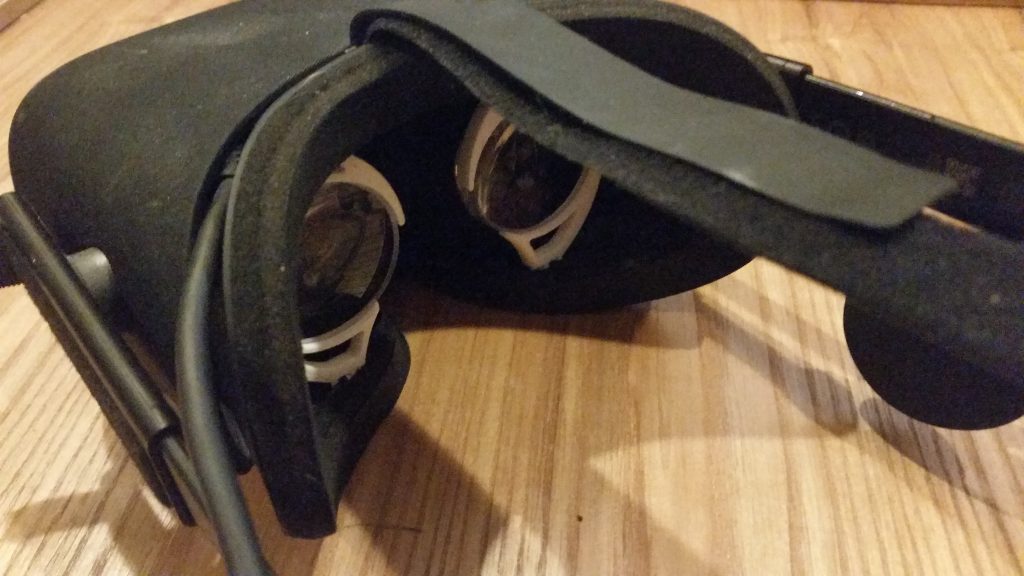
Finally, carefully reattach the visor, making sure to keep the cable at the upper left positioned correctly.

Enjoy your new, properly-focused universes!

Posted in 3D Printing, Flight Simulator, Games, HOW-TO, Toys, Virtual Reality | Leave a comment

EPROMs

EPROMs are interesting devices. With the advent of Flash memory, they’re not in common use these days. However, they are extremely easy to integrate into hobby electronics, and can serve several functions, including a few off-label ones that I’m currently investigating.

A 64kb (64 kilobit, or 8kB) EPROM, containing 65,536 individual bits.

EPROM stands for Erasable/Programmable Read-Only Memory. As the name implies, it can be erased and reprogrammed, but this is typically not done in circuit. Instead, specialized eraser and programmer units are used to reset the chips and then program them. The new semi-permanent ROM chips can then be used in a TTL circuit just like custom ROM chips; place the address on the address bus, lower ~CE, ~OE, and ~RD, and read the data from the data bus.

EPROM chips are reprogrammed in a two-step process. First, the cells are cleared by setting them to all-ones. Any covering of the optical window is removed, and the chips are subjected to ultraviolet light, which quickly resets all of the exposed memory cells to the “1” state. Programming, done in a separate device, then consists of zeroing out everything that shouldn’t be a 1, much like Michelangelo removed the marble that wasn’t part of his statues.

This is all transparent (pardon the pun) to the user; you simply “bake” the chips in the UV “oven” and then use the programmer per the directions.

Once you understand the process, though, it’s possible to try more interesting experiments. EPROMs are inherently analog devices, with analog amounts of charge stored in each cell.

A closer look at the EPROM die, through a microscope. (Click for larger.)

In the past, others have made clever use of the inherent analog nature of EPROMs by using them to store “digilog” audio — sampled audio, stored as analog charges instead of binary representation. Certainly one of the more unique audio storage methods out there: instead of storing zeroes and ones at every address, eight analog charges were stored.

Due to their optical erasure method, EPROMs can also be used to sense light exposure. Although the data sheets state to “bake” the chips for roughly 45 minutes to an hour for erasure, I’ve found that as little as 20 to 30 seconds is often enough to at least make the chip read as erased. (It may be that longer erasure times help ensure that the 1s remain readable.)

They probably won’t be much use as imaging sensors — even if an image could be properly focused on the split halves of the die, the image would only be roughly 256 by 256, in grayscale. Not exactly high definition. But they might make interesting sunlight-exposure sensors.

Posted in Components, Digital, Electronics, Nostalgia | Leave a comment