Musical Witchcraft

Several years back, I bought a “The Very Best of Tom Paxton” CD. Among several other really good songs, it had a new version of “Jennifer’s Rabbit” — one of my favorite songs from childhood. (There’s not nearly enough good fantasy in the world.) I especially liked what he’d done with the intro to the song in this version: a single note, in a minor key, which set a mysterious, exciting mood for the song.

It wasn’t until I learned a bit more about music theory, though, that I sensed that something was up. Single notes, by themselves, are never major or minor. “Also Sprach Zarathustra” is a great example of this — a tonic, a dominant, then a tonic one octave up, followed by a major chord and a minor chord in quick succession. It’s a neat effect which relies on the fact that with the first three slow notes, the major-vs-minor question hasn’t been resolved yet (no third, major or minor, has appeared yet.)

The opening note of “Jennifer’s Rabbit” seemed to have been crafted by resorting to dark magic: setting a minor-key tone with a single note just isn’t possible. (In fact, that note turns out to be the tonic — present in any key, major or minor.)

How did he do it?!? This was a job for Audacity!

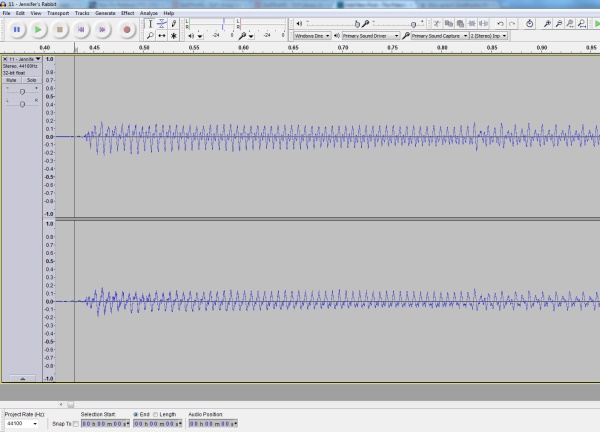
The waveforms for the opening notes. (Click for larger.)

The song opens with the single guitar note — at about 147Hz, probably the D below middle C. About 400 milliseconds later, though, the pattern changes subtly. If you listen, a minor third has been introduced, not quite loud enough to really be obvious. Sneaky!

…but Tom Paxton, after all, is the guy who wrote “The Marvelous Toy.” I’ve known for many years that he’s a musical genius. I just wondered if he’d found a way to rewrite a thousand years of Western musical theory!


Posted in Analog, Music, Nostalgia, Science | Tagged , , , , | 1 Comment

Thoughts on LabVIEW

NI LabVIEW is a graphical “programming language” oriented toward experiment and data acquisition automation. It’s useful in a lot of situations, and fairly easy to pick up. I’ll even give LabVIEW a pass for being a proprietary vendor-specific tool (and not an open-standard language like C). Proprietary tools are often useful, and even with the best of intentions, open-source communities don’t always have the resources to provide slick, easy-to-use tools.

For certain tasks, mostly involving data capture and analysis, LabVIEW is a very useful and intuitive way to create software for laboratory automation. If an experiment required the capture of a signal, outputting a snapshot of a Fourier transform whenever certain parameters were met, LabVIEW would be a good choice of software tool.

However, LabVIEW, by its nature, is unbelievably bad at certain other tasks. Specifically, basic arithmetic operations are generally done by wiring numbers to mathematical operators. To add two and four, you create “constant” objects for “2” and “4”, then run wires from each of these into an “addition” module (which looks like a miniature op-amp symbol.) This makes wonderful sense when routing signals and control lines; not so much when performing basic arithmetic.

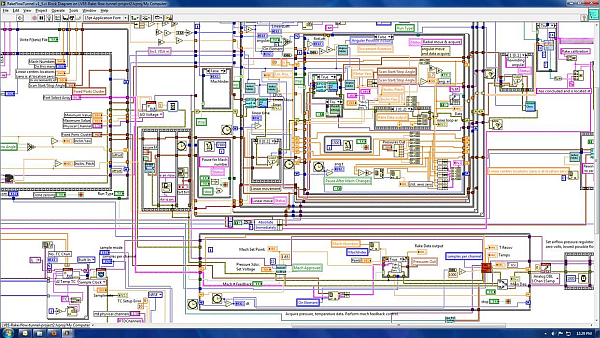
The true nightmare, though, doesn’t appear until complex program-flow logic gets into the mix. Once an application becomes more than moderately complex, the LabVIEW schematic quickly starts to look like a psychedelic plate of alien spaghetti. One image in particular that I found on The Daily WTF illustrates the point beautifully.

*Literal* spaghetti code! (Click to see it in all its high-def glory...)

When your “program” looks like this, the language is trying desperately to tell you something. Pain, after all, is Nature’s way of saying “DON’T DO THAT!” Here, LabVIEW is doing its best to tell the programmer that it just doesn’t naturally bend in that direction. It’s like trying to implement linked lists in BASIC or writing a flight simulator in LISP. It might be possible, but that doesn’t mean it’s a good idea.

A while back, I buttonholed a NI rep at one of their local “hands-on” seminars. (One thing NI does very well is customer relations and training.) I eventually got him to admit that yes, there is an actual language behind the scenes that all these graphical connections are eventually compiled into. He mumbled something about it being for NI developers only right now and not-really-ready-for-prime-time and so on.

Even if that’s so, having the option to code in actual code would be very helpful. LabVIEW could retain the graphical interface for signal-flow applications, while offering a C-like text interface for applications that work better with more complex control structures. There are even ways to do concurrency (one of LabVIEW’s selling points) in textual languages — and in fact, this has probably already been solved in NI’s behind-the-scenes language.

Why not let the man behind the curtain out to meet the customers? I’m sure a lot of good would come from it. I know a lot of LabVIEW applications would become a lot easier to understand if this could happen.


Posted in Coding, Electronics, Tools | Tagged , | 2 Comments

Diamagnetic Levitation

Earnshaw’s Theorem states that “a collection of point charges cannot be maintained in a stable stationary equilibrium solely by electromagnetic interaction of the charges.” In other words, no arrangement of permanent magnets, no matter what their polarity, strength, or arrangement, can result in magnetic levitation (unless tricks like gyroscopic stabilization, geometric restriction along one axis, and/or closed-loop electronic control are used.)

Earnshaw was a spoilsport!

Fortunately, it turns out that there’s a loophole — diamagnetism. Certain materials repel all magnetic fields (albeit very weakly), and this effect can indeed be used to produce continuous magnetic levitation, with no electronics or power sources needed.

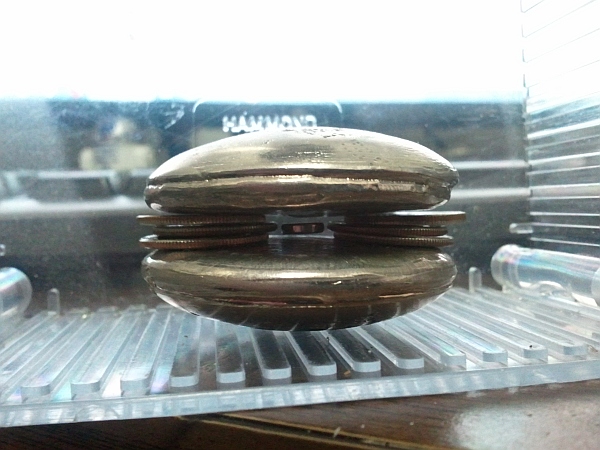
Bismuth is generally used for experiments like this. It’s one of the most diamagnetic materials around, fairly easily worked (it melts at 271 degrees C, which can be achieved over a kitchen stove), and is nontoxic enough that it’s the active ingredient in Pepto-Bismol. At about $70/kg on eBay, it’s not dirt-cheap, but neither is it as expensive as gold or platinum, so it’s within reach of most amateur scientists. With the proper setup, the diamagnetic properties of bismuth can be used to make magnets levitate — permanently — with no power supply or PID controller in sight.

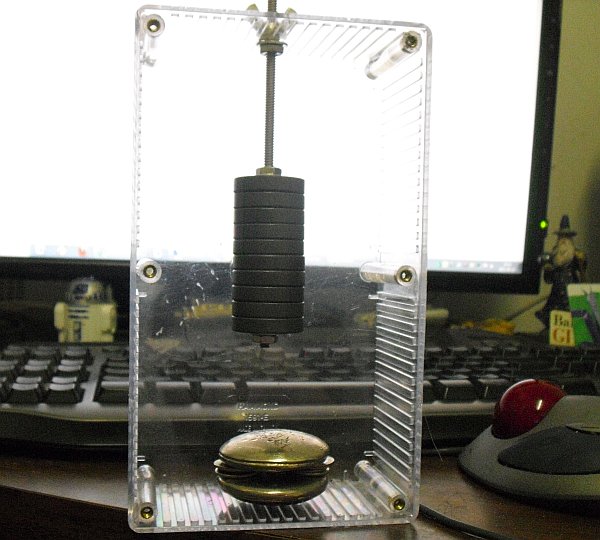
A neodymium magnet floating in midair! (Click for larger.)

Having seen an interesting article online on how to make diamagnetic levitation work, I bought a pound (about 450g) of fairly pure bismuth on eBay and stopped by Lowe’s and Radio Shack for a few parts I didn’t have. (I really need to get a house, where I can have a properly-equipped lab. Not having bismuth is understandable, but not having ring magnets or 10-24 threaded rod stock on hand is embarrassing.) Here’s what’s needed for the levitation project:

  • About 300g of fairly pure bismuth metal (the chunk I bought was claimed to be 99% pure, and worked fine);
  • A small, lightweight neodymium magnet. (I used one of the “small discs” in a neodymium magnet set from ThinkGeek);
  • Several ceramic ring magnets (I used two 5-packs from Radio Shack);
  • A length (maybe 30cm or so) of 10-24 threaded rod;
  • Two hex nuts, three washers, and a wing nut for the threaded rod;
  • A project box or other enclosure (to hold the ring magnets over the bismuth);
  • Something to hold the bismuth discs apart (I used two stacks of three dimes each).
  • Three clean, empty aluminum cans
  • A furnace capable of 300 degrees C or so. (Bismuth melts at about 271.5 degrees C, but I found that using 450C made it melt more easily. Aluminum is good up to 660 degrees C, so stay well below that. You can use a kitchen stovetop if you don’t have a furnace available.)
  • Metalworking tongs, if using a furnace.
  • A milling machine, or at least a file / Dremel tool / sandpaper, to flatten out the cast bismuth discs.

First, prepare two empty aluminum cans; remove the pop-tops and turn them upside-down. (The molten bismuth will be poured into the indentations.)

Next, cut the bottom part of the third can off (leave about half to 2/3 of the can attached to the bottom; you’ll use this as the crucible.)

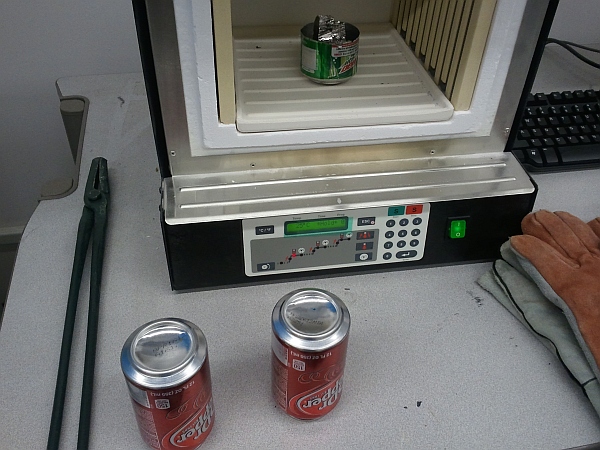
Place the bismuth ingot in the can bottom and use the furnace to heat it until it’s nicely melted. (Unlike most things except water, solid bismuth is less dense than the liquid, and should float, so it should be easy to see when it has all melted.)

Ready to melt the bismuth. (Click for larger.)

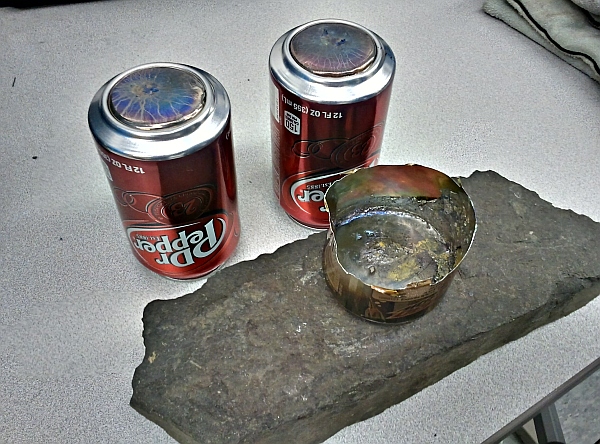
Using the tongs, carefully remove the can from the furnace and pour the molten bismuth into the indentations in the two other aluminum cans. Allow them to cool (make sure to set the can crucible on a heatproof surface while it cools, as well.)

The cast bismuth, solidifying in the aluminum-can molds. (Click for larger.)

Once the bismuth and cans have cooled to room temperature, pry the bismuth out. Bismuth is brittle, so take care not to chip it too badly. (I found it necessary to cut the cans apart and tear them open enough to release the bismuth.)

Mill, sand, file, or otherwise flatten the discs, without making them too thin. They will work better to repel the magnetic field if they are flat. The ones I made initially had a peak near the center that had to be flattened out with a Dremel tool. I plan to mill them flat next week.)

Next, it’s time to assemble the project. Here’s an overview picture, to give an idea of what you’re making:

The whole setup, magnets and all. (Click for larger.)

Thread the ring magnets onto the threaded rod, and secure them with hex nuts and washers at each end. They should go nearly at one end of the rod, leaving just enough rod left over to ensure that the nut doesn’t come off. (This isn’t very critical; you can leave a few mm and still have it work fine.)

Thread another hex nut, then a washer, onto the rod from the top. Lower these to near where the magnets are. Cut a hole in the top of the box or enclosure large enough for the rod. Using the wing nut and another washer, suspend the rod about 20cm above the bottom of the box.

At this point, take the small neodymium magnet and note which side is attracted to the end of the magnet rod; this end will need to point upwards. (Try not to let it jump onto the rod; neodymium discs are brittle.)

Place one bismuth disc, flattest side up, in the bottom of the box, centered under the magnet stack. Place the dimes or other spacers around the edges of the disc, leaving enough room in the center for the disc magnet to float freely.

Place the neodymium magnet onto the bismuth disc. Carefully lower the second bismuth disc, flattest side down, onto the spacers.

Now to adjust it. At this point, the magnet should be resting on the bottom bismuth disc (gravity pulling it downwards with more force than the magnetic force from the ring magnets plus the diamagnetic repulsion from the bottom disc are exerting upwards.) Very gently, start rotating the threaded rod to slowly lower the magnet stack towards the bismuth discs. You should see the disc magnet start to “dance” around a bit, then lift up on one end, then eventually leave the bottom disc altogether and float in the air. If you overdo it, or if the bismuth discs are too far apart, the disc may skip the “floating” phase and bump into the top disc. If this is the case, back off on the magnets a bit to get the disc to float lower. If you can’t find a setting where the disc floats, decrease the distance between the bismuth plates.

Here’s a video of the completed project doing its thing, even while being subjected to gentle puffs of compressed air and being poked at with a (nonmagnetic!) stick…

Have fun! Send me an email (“eric” at this domain) if you have questions.

Posted in Bismuth, HOW-TO, Level 3, Metalworking, Projects, Science | Tagged , , , , , , | Leave a comment

Virtual Worlds: Minecraft

Minecraft!

I’d heard about an interesting new world called “Minecraft,” so I thought I’d see what it was like. A short download later, an icon looking like a block of earth appeared on my desktop. Double-clicking it and filling in some information (Name the world? Okay. Random seed? Let’s go with 1024 for reproducibility. Graphics detail? Sock it to me. Do I want monsters? Naah — not just yet…), I found myself looking at a sunrise over a sandy tidal pool, with low hills on both sides.
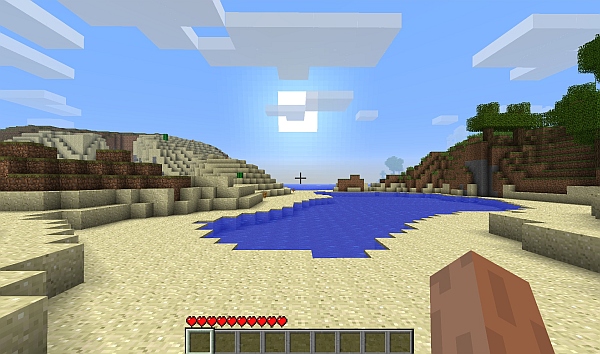
A new, blocky world awaits! (Click for larger.)

Something about this world was strange, though. It seemed that its creator followed the Integer Mythos. Think “Mario Brothers” (or “Donkey Kong,” for those of us old enough to have first associated Nintendo with Atari 2600 cartridges and coin-op arcade games.) In contrast to other worlds I’d visited, such as Cyrodiil, nearly everything in Minecraft is rendered in 1m x 1m x 1m blocks.

At first, this looks like a cheap way to avoid a lot of the work associated with creating a 3D virtual world. Make everything out of identical blocks, and lots of tasks become a lot easier. The gods must be lazy, I thought.

This kind of world has a definite appeal, though. Nearly all of the blocks in the world can be modified by digging and/or placing them. Various constructs can be made this way, from houses to mines to railroads and rudimentary roller coasters. The beauty of such an integer-based world is that it’s reproducible. A complex, intricate mechanism built in one location can be duplicated in another, given the same resources and space — and it will work exactly the same. One block of cobblestone (or dirt, or lava) is identical to any other block of the same type. Once you know how to build something, you can reproduce it elsewhere and be assured that it will work exactly the same way. (The framerates are excellent, too; glass-smooth throughout.)

There’s a lot to build, too. The world contains many kinds of raw materials, and there are many “recipes” for combining these to make different items. Some of the more useful ones are pickaxes, torches, shovels, axes, storage chests, etc. Get a block of wood from a tree and turn it into planks; take these planks and make a crafting table; use the larger surface of the crafting table to make a wood pickaxe; mine stone to make a stone pickaxe and a furnace; use the stone pickaxe to mine iron to melt in the furnace to make iron ore; use the iron ore to make an iron pickaxe… you get the point.

Even with the uniformity, though, there’s plenty of variety. There are over 100 kinds of blocks (so far); even in a modest 10x10x10 cube of blocks, there are more than 100^1000 possibilities. (That’s a one with 2,000 zeros after it.) And the world of Minecraft is much larger (much MUCH larger) than 10x10x10!

Eventually, I started to wonder — how big *was* this new world I found myself in? Would I eventually fill it up and run out of things to do? I climbed a nearby hill and looked around. The world seemed to end in fog some distance away. Not quite as big as Cyrodiil, then — I could walk over there without too much effort, I thought. I made a note of what the edge-of-the-map features looked like in one direction and started walking / swimming.
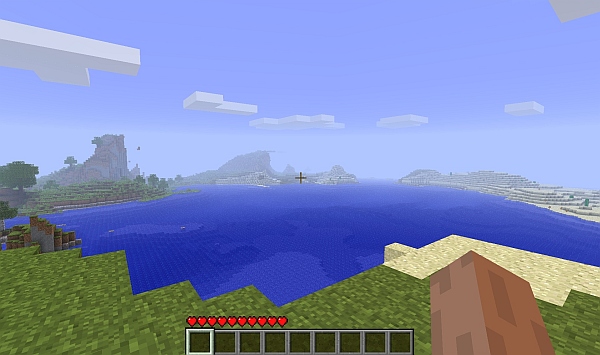
The view from a local hilltop. (Click for larger.)

Halfway there, I climbed another low hill to take a look. The features that were on the edge of the map were closer, with other features beyond them. This world was larger than it seemed; there was as much land ahead as I had seen before. Such a world was no doubt rendered by sections — and if these were programatically generated, the end of the world could be a long distance away, indeed. I turned back, deciding that there was a high probability that I wouldn’t be able to answer this question in-world anytime soon. (As it turned out, this was correct. Minecraft is very VERY big, and would take some 820 hours of constant walking to reach even the closest definition of the “end of the world.”)
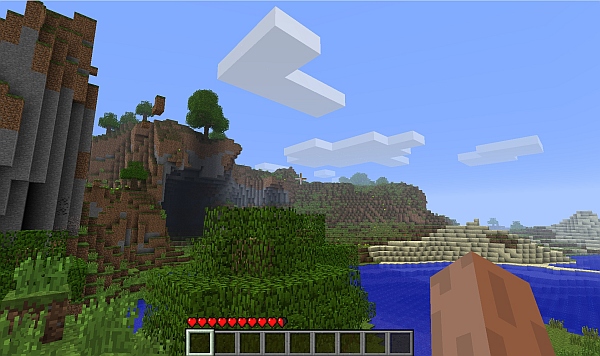
The view after traveling a bit. (Click for larger.)

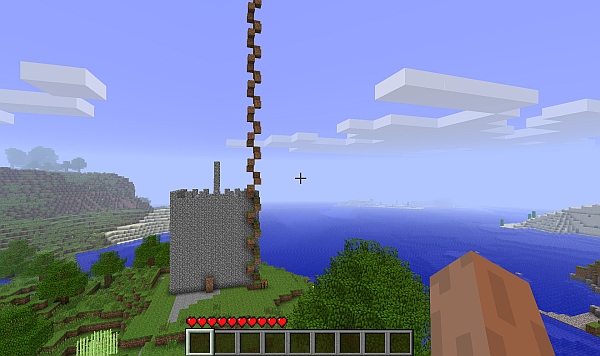
I couldn’t find out how far the world extended in the cardinal directions — at least for now — but what about height and depth? Not knowing much about mining, but having had some luck moving dirt blocks around, I started building a tower. Blocks, as it turns out, can float in midair; physics works a bit differently here. This is unintuitive at first, but allows very minimalistic towers to be built: a 2×2 square of blocks, with one block per level in an ascending helix. (Just don’t fall more than a few meters!) A bit after reaching the clouds (58 levels up from where I started), the world topped out. Blocks could no longer be placed above this level. So there is a definite, reachable-but-reasonable limit to height.
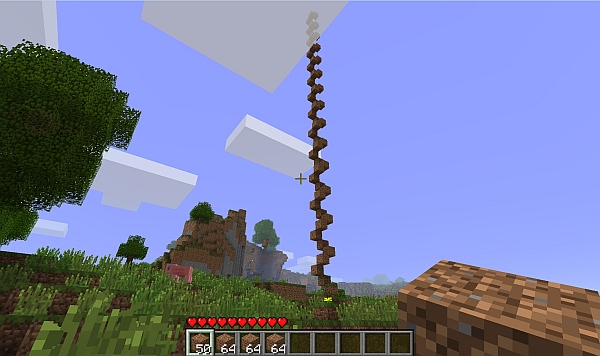
A helical stairway rising above the clouds. (Click for larger.)

What about depth? Along the same lines as the tower, I found that a 2×2 square could contain a spiral staircase down into the earth, lowering one meter for every 90 degrees turned. Whereas one block needed to be placed per level for the tower, three need to be excavated for a staircase in rock. (People in Minecraft are exactly two meters tall; the third block is needed for headroom when ascending and descending.)
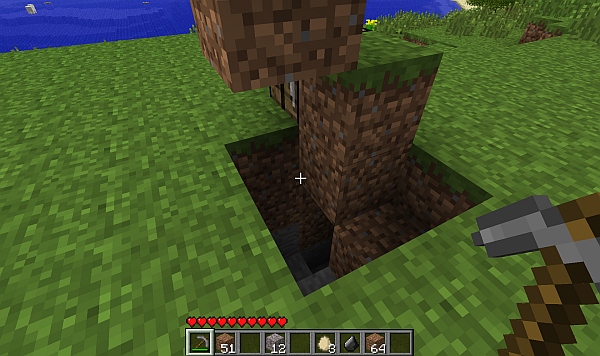
A 2x2 spiral stairway down into the earth. (Click for larger.)

After several meters, it got too dark to see, so I had to turn back (and learn how to make torches). Torches are formed from coal (or charcoal), plus a stick; you need to either mine charcoal using a pickaxe, or build a furnace and burn wood blocks. Once torches were available, I was able to continue my spiral staircase downwards for another 64 levels, eventually reaching impermeable bedrock (or “adminium” as it’s also called.) In places, reachable areas extended another four levels, making a total of 126 level changes — 127 levels — between the bottom and the top of the world. Add another level since avatars in Minecraft span two blocks, and you get 128 levels. A nice even number for computers, but not quite as nice and round as 256. Perhaps performance considerations limited the level span?
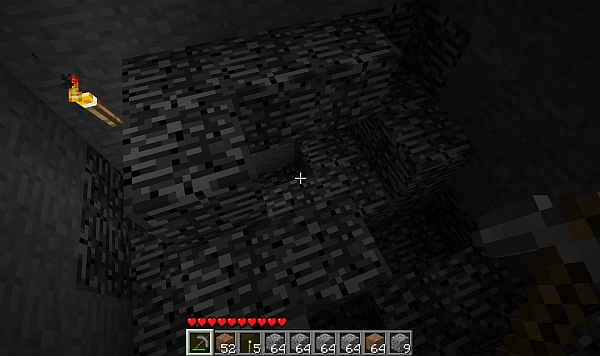
Impermeable bedrock at the bottom of the world. (Click for larger.)

Weight and volume are definitely more a state-of-mind thing than actual physical limitations. For instance, a Minecraft character can carry 36 items, including nine “equipped” slots, but not counting armor. Each of these “items” can be as many as 64 of a “stackable” object type, such as rock. This means that — even though each “stone block” represents a 1m x 1m x 1m block of stone, a Minecraft character (ostensibly human) can carry 2,304 of them without even really trying!

I decided it would be fun to show this graphically, so I loaded up my avatar with cobblestones and started building a 13x13x13 cube. This took 2,197 blocks, so I had 107 left over for decorations. Here is the result, with a 2x1x1 (avatar-sized) stack of dirt blocks in front of it, representing a Minecraft avatar.
This is how much stone an avatar can carry at once. That cube is solid stone. (Click for larger.)

Technology exists in Minecraft, too — boats, railroads, gates, pistons, and even digital logic elements. It’s possible to build a working computer in Minecraft — but that’s a topic for another time.

 

Posted in Coding, Digital, Digital Citizenship, Games, Minecraft, Science, Toys | Tagged , , | Leave a comment