Accu-Feel: giving FSX a shot of realism

Sometimes, it’s the little things that really add to the experience.

Although it’s several years old, FSX is still a pretty decent flight simulator, especially with nice add-on aircraft like A2A‘s Boeing 377 with Accu-Sim or PMDG‘s Boeing 737 NGX. I’m a systems geek, so I appreciate the detailed systems modeling in the larger aircraft — from engine, fuel, and oil management on classic supercharged propliners like the 377 to long-haul computer-assisted navigation in state-of-the-art aircraft like the NGX. It still doesn’t always really feel like flying, though — but until just recently, I wasn’t sure just why.

Accu-Feel, an unassuming $14.99 add-on from A2A, changes that. It mostly models all of the subtle sounds associated with your flight. This doesn’t sound like much of an improvement — but it changes everything. Landing a Cessna in a crosswind no longer simply triggers a tire-screech sound. Instead, Accu-Feel’s code checks to see when and how each tire contacts the ground (and what type of ground it contacts), and dynamically generates sounds accordingly. Subtle cues like this really add to the experience in a big way. Accu-Feel models several other effects, as well, including pre-stall buffeting according to the wings’ dynamically-calculated angle of attack during flight.

Check out A2A’s video on the features of Accu-Sim — and if you’re a FSX enthusiast like me, you’ll end up wanting to try it for yourself. If so, you won’t be disappointed.

Posted in Digital, Flight Simulator, Reviews | Leave a comment

Heathkit is back!

After twenty years, Heathkit is getting back into the electronics kit business. Many electronics hobbyists who were active in the second half of the last century remember building kits from Heathkit. A wide range of devices were available in kit form, from oscilloscopes to amateur radio receivers and transmitters, to computer trainers and EPROM programmers. Like many electronics enthusiasts, I was sorry to see them exit the kit business in 1992.

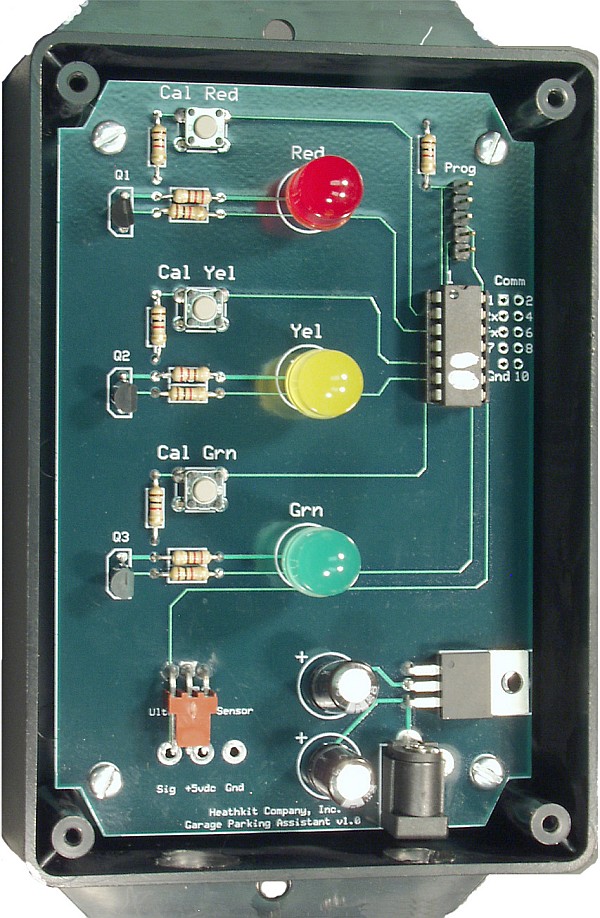
Twenty years later, though, Heathkit appears to be back. Their first kit — a garage parking assistant — is already available. Although the technology is modern  (the kit appears to use an ultrasonic sensor very much like Parallax’s PING))) sensor), the through-hole construction, solid-looking engineering, and apparent attention to ease of construction appear to be there.

Heathkit's GPA-100 Garage Parking Assistant kit, assembled. (Click for larger.)

For $129.00US, though, it ought to be! Ultrasonic sensors aren’t dirt-cheap, true — the PING))) sensor costs about $30 — but even so, this kit could easily be build for half of what Heathkit is asking, including picking up the parts and a basic soldering outfit from Radio Shack. An ultrasonic proximity sensor is a fairly straightforward project, especially if something like the very easy-to-use PING))) sensor is used. A single microcontroller, power supply, a few resistors, a PC board, and a case would be about all you would need.

Perhaps Heathkit is including tools to make the package a better deal, though. The board includes a programming header for what appears to be a PIC or similar microcontroller. The addition of a PIC programmer such as Microchip’s PICKIT2 or PICKIT3 would make the $129 price tag a lot more appealing to a hobbyist wanting to learn more about microcontroller-based design. Unfortunately, no information about the kit specifics is available on Heathkit’s site. Without this information, it’s hard to make an informed decision on whether the kit contents are worth the high price.

It’s nice to see a legendary Maker-friendly company like Heathkit get back into the DIY business. However, it’s likely that Heathkit’s potential customers fall into one of two categories: former Heathkit enthusiasts who have fond memories of building vintage Heathkit gear — and newcomers to the hobby, who may have heard of Heathkit but who are too young to really remember the way it was. The former group will probably have long since moved beyond simple kits like garage parking assistants — and the second group is probably ‘Net-savvy enough to know that these days, Heathkit has serious, low-cost, high-quality competition from the likes of Adafruit, Sparkfun, Element14, and Jameco.

Even Radio Shack, not normally known for low prices, has been doing a much better job recently. Heathkit will need to step up its game — quickly — to remain relevant. I wish them luck.


Posted in Digital, Electronics, Nostalgia, Reviews | Leave a comment

Got Rubidium?

A nice side benefit to living in an increasingly technological age is the availability of interesting secondhand tech gear on sites like eBay. I recently came across a pair of Rubidium-based 10MHz atomic frequency standard modules for about $100 including shipping.
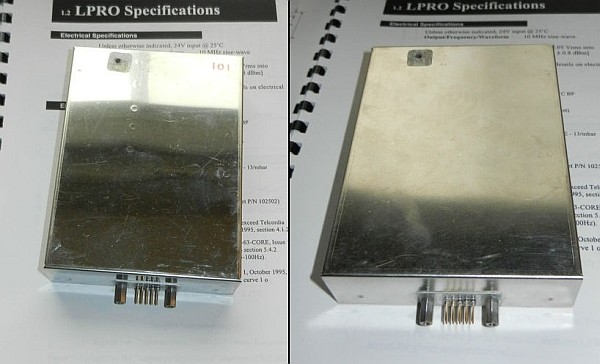
The Rubidium modules as seen in the eBay listing. (Click for larger.)

Rubidium frequency standard modules are considered by NIST to be secondary frequency standards — far more accurate and stable than most typical oscillators, including oven-controlled crystal oscillators — but not quite as stable as cesium-based units. Rubidium units have an accuracy of about 0.1 to 1.0 parts per billion. In other words, they would gain or lose just of a fraction of a second per decade.

The way they work is quite interesting: a rubidium lamp is used to produce light of a certain frequency (6.834682610904324 GHz), which corresponds to the time period of a transition between two specific hyperfine energy levels of rubidium atoms. This light passes through a chamber filled with gaseous rubidium before being sampled by a photodetector. A high-energy RF signal of around 6.8GHz is then applied to the chamber. This frequency tracks higher and lower by about 15-20 parts per million (PPM), until the photodetector senses a dip in the light being transmitted. Once this dip is sensed, it means that the applied frequency is the same as the resonance frequency of rubidium (the frequency match means that more photons from the Rubidium lamp are absorbed.)


A diagram of the rubidium frequency standard control loop. (Source: nist.gov)

When the frequency is locked (via a phase-locked-loop) to match this transmission dip, the applied RF frequency is known to be within a fraction of a part per billion of the  resonance frequency of rubidium, which is known to very high accuracy. The frequency is then divided down to produce a very exact 10MHz reference signal.

After a brief check, I set up the two modules; the requirements are surprisingly basic — just a 24V power supply. I then compared the two 10MHz output signals on an oscilloscope once both had achieved rubidium lock. It took 136 seconds for the difference between the two clock phases to drift by one cycle with respect to one another, starting a minute or two after the second one achieved lock.
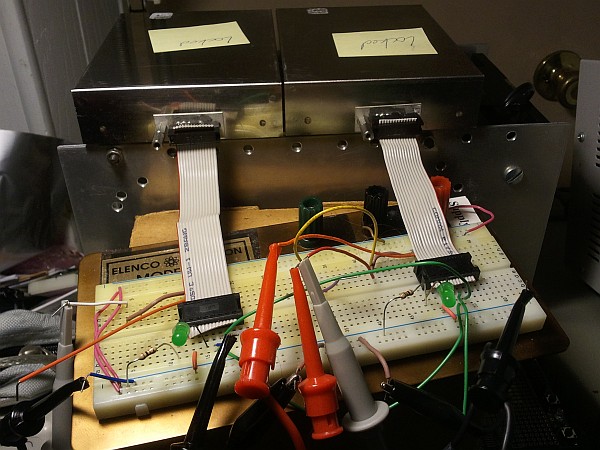
Testing a pair of rubidium frequency standards. (Click for larger.)
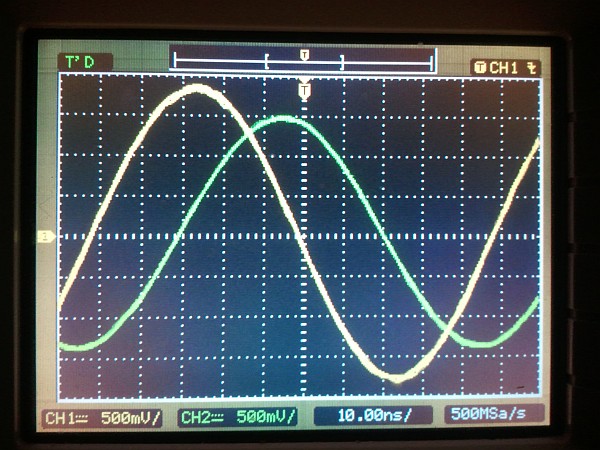
 

Viewing the phase difference between the 10MHz signals from both units. (Click for larger.)

After letting the clock modules run overnight, the time for one 360-degree phase shift between the two reference signals had lengthened to 400 seconds. At a signal rate of 10MHz, this means that the clock modules would disagree by one second for every 4,000,000,000 (four billion) seconds elapsed. In other words, running continually like this, they would disagree by one second every 126.75 years. (By contrast, the most accurate mechanical clocks gain or lose a second every year or two.)

Unfortunately, the downside of buying “as-is” units on eBay is that you often run into reliability problems. While both units do work and do achieve Rubidium lock (as the seller stated), the second unit has a very low rubidium lamp voltage (~2.43 volts). This indicates that it is near the end of its service life (the rubidium lamp has a finite lifetime). This explains why Unit 2 loses rubidium lock periodically (making it the equivalent of a rather oversophisticated crystal oscillator.) Amazingly, even without the rubidium lock, it still runs within 20PPM of the correct frequency — more than twice as stable as a typical TTL oscillator module. However, the rubidium phase lock is the whole point here: this provides roughly ten to twenty thousand times more accuracy.

According to the specifications I could find, healthy lamp voltages are in the 6-9 volt range, with higher being better (within reason). Fortunately, the first unit has a lamp voltage of around 8.9V, suggesting that it should be quite reliable. According to a technical note by the Datum corporation, the Rubidium package shouldn’t wear out, so the loss-of-lock problem may yet be manageable.

Unit 1, meanwhile, runs nicely — with a frequency variation of only about 1Hz out of 10MHz over an hour-long test run, according to my frequency counter.
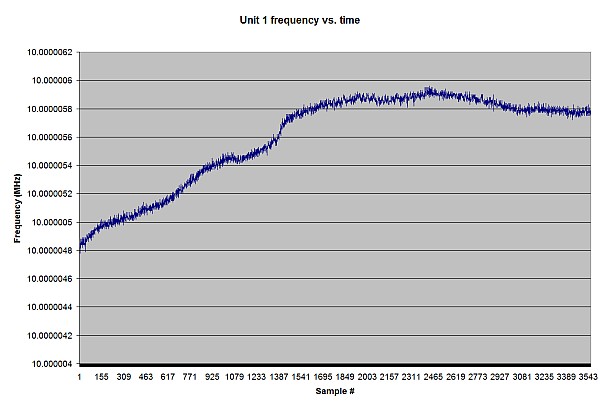
Frequency drift -- probably mostly that of the frequency counter -- as measured over one hour. (Click for larger.)


I have cool plans for these little modules, once I either get the second unit to work reliably or find a replacement. With fraction-of-a-part-per-billion accuracy, all kinds of interesting experiments become possible, including investigating Einsteinian relativity. The first step is to make a management module, which would provide power, track number of pulses since reset, keep track of any loss-of-lock incidents, and monitor temperatures and voltages.

 

Posted in Electronics, Science | Tagged , , , , , , , | 2 Comments

Sugru

While ordering the latest batch of toys components from SparkFun, I noticed something new — a 12-pack of moldable, air-curable rubber called Sugru. The description said that it could be used for all kinds of hacks, repairs, and inventions. It looked interesting, so I picked up a pack to try out.

The Sugru sample pack.


Opening the pack, I found twelve packets in various colors, two sets of Sugru stickers, and a mini instruction manual.

The contents of the Sugru sample pack. (Click for larger.)


Opening up a blue packet, I found the Sugru material quite a bit tackier than I’d expected. It’s like a mix of modeling clay and Silly Putty, and seems to want to stick to everything.

Sugru in its native habitat. Now I know why they recommend cutting through three sides of the package to get at it. (Click for larger.)

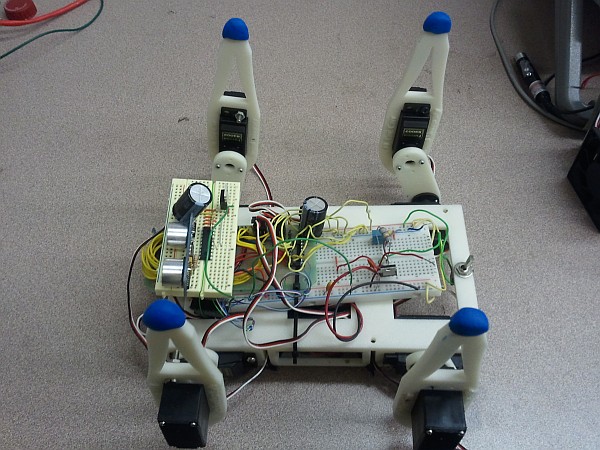
I initially tried making a D4 (tetrahedron), but wasn’t able to form the shape accurately, since the Sugru stuck to the desk. (It sticks to everything.) I then split it into four pieces and formed “feet” for the SIGMA walking robot.

The robot with its feet in the air, waiting for the Sugru to cure. (Click for larger.)

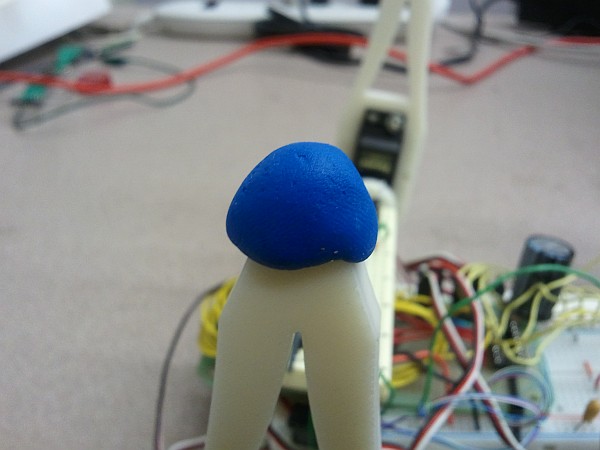
A closeup of one of the robot's new Sugru feet. (Click for larger.)

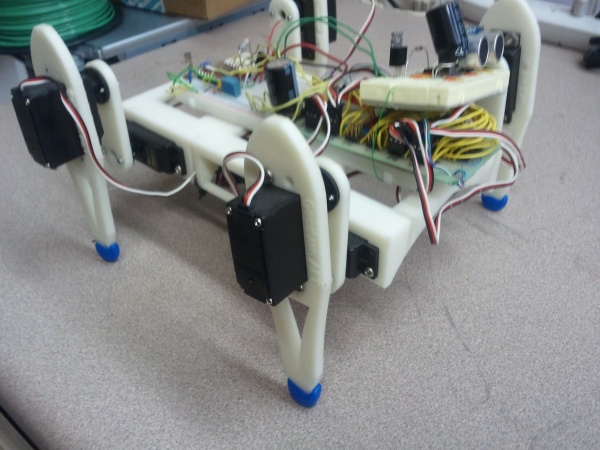
A couple of days later, the Sugru had cured nicely into a rubbery form, and the robot was ready to try out its new shoes.

The SIGMA robot's new Sugru shoes. (Click for larger.)

I’m still figuring out what I’ll use Sugru for, but it does seem to work well for various types of small mechanical hacks — basically, any place you’d like to be able to put Silly Putty and have it cure into a waterproof rubber-like substance over a day or two.

Posted in Design, Reviews | Leave a comment