“Wye Knot”

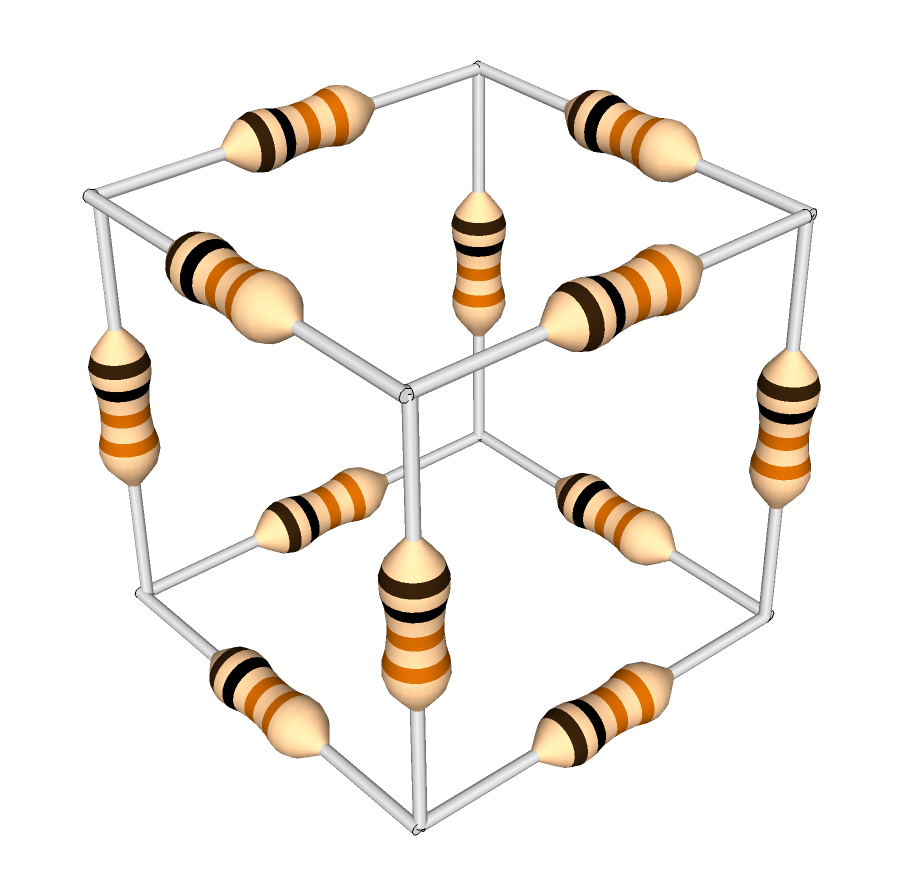
I came across an interesting puzzle a while ago (stated in one of the excellent Feynman Lectures on Physics): What is the resistance between two opposite corners of a cube made from 1-ohm resistors?

At first, the problem looks like it might just be an exercise in resistance simplification using the well-known laws of parallel and serial resistances: Serial resistances add linearly, and parallel resistances follow 1/R = 1/R1 + 1/R2 etc. Unfortunately, this one isn’t quite so simple — three resistors meet at each vertex of the cube, and no two are directly parallel to or in series with each other.

A cube of 1-ohm resistors. What is the equivalent resistance between opposite corners?

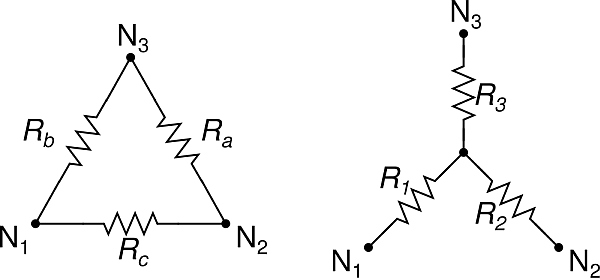
One solution to this problem is to use the Wye-Delta conversion formula. Each of the corners of the cube is the center node of three resistors in a wye configuration.  These three resistors can be replaced, and the central node removed, by following the formula:

Wye-Delta conversion formula

(formula from Wikipedia)

Rp in the formula is the sum of products — that is, R1R2 + R2R3 + R1R3.

Delta and Wye configurations. (Click for larger.)

(image from Wikipedia)

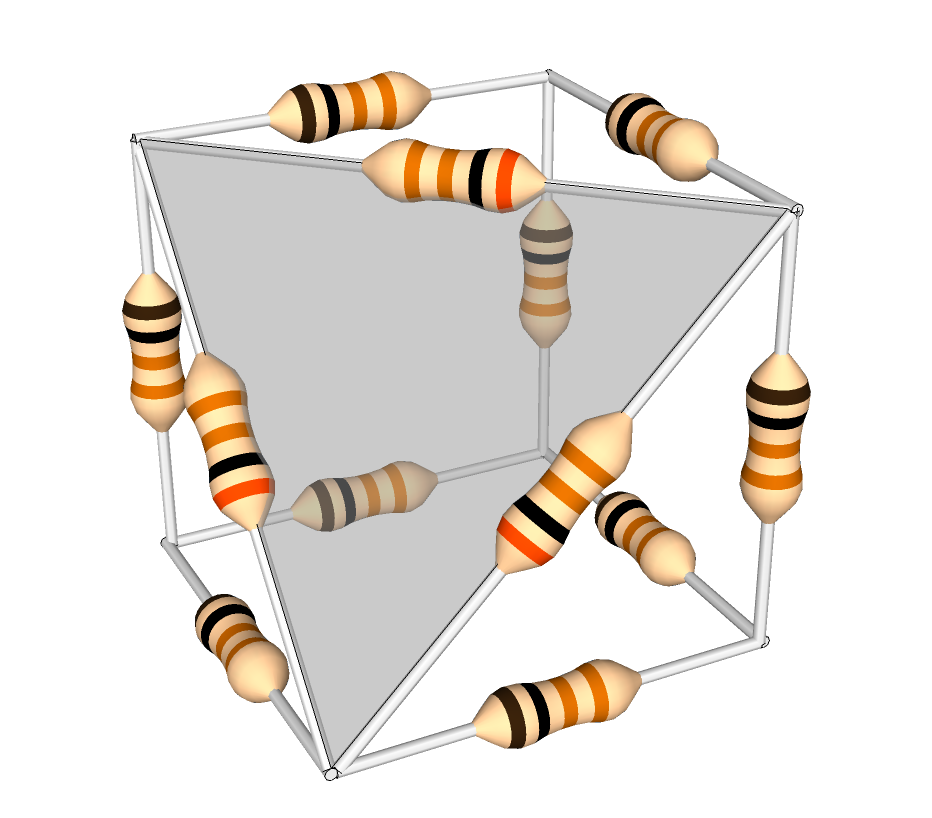
Using this formula, corners of the cube where three 1-ohm resistors meet can be removed; the three outer vertices of this wye are then connected by the equivalent network of one 3-ohm resistor between each pair of vertices (see image).


The cube, with one (shaded) corner transformed. Note the 3-ohm resistors.

One way you can think about this is that, initially, the resistance between any two nodes of the wye is 2 ohms (the inbound resistor plus the outbound resistor.) In order for the delta network to be equivalent, this resistance must be the same; the value of the delta resistor connecting those two nodes, in parallel with the sum of the other two delta resistors (for the long path around the triangle), must equal the original value of the resistance between the two nodes of the wye. For a wye of 1-ohm resistors, this is 3 ohms, since a 3-ohm resistor in parallel with a 6-ohm equivalent will equal two ohms. (1/3 + 1/6 = 1/2)

You can continue reducing the network in this way — but it turns out that symmetry and a little common sense provide an easier way to solve the puzzle.
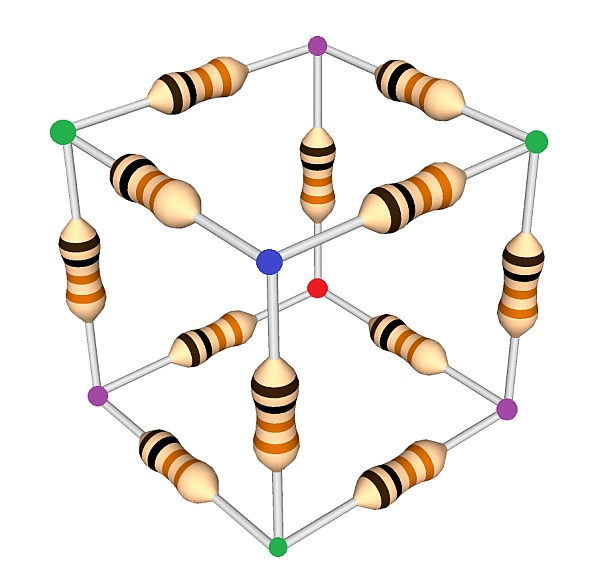
The cube, with equipotential points shown, assuming resistance measured between blue and red. (Click for larger.)

Suppose that in the cube above, a voltage source is connected between the blue and red nodes. The resulting current can be used to determine the overall resistance. To calculate this without resulting to Wye-Delta conversions, note that all of the “purple” nodes are at the same voltage (due to symmetry), and all of the “green” nodes are at the same voltage (also due to symmetry). Because of this, the three purple nodes and the three green nodes can therefore be connected by wires in order to simplify the analysis. Because no voltage difference exists between the nodes, no current will flow across these wires, so the nature of the circuit hasn’t been fundamentally changed.

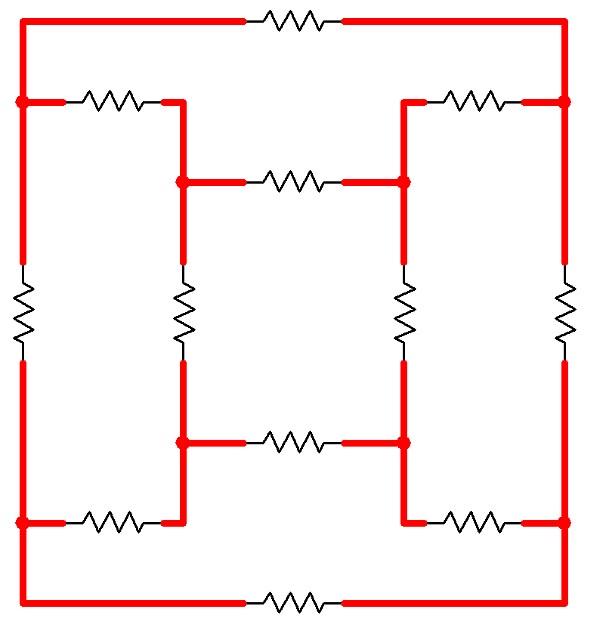
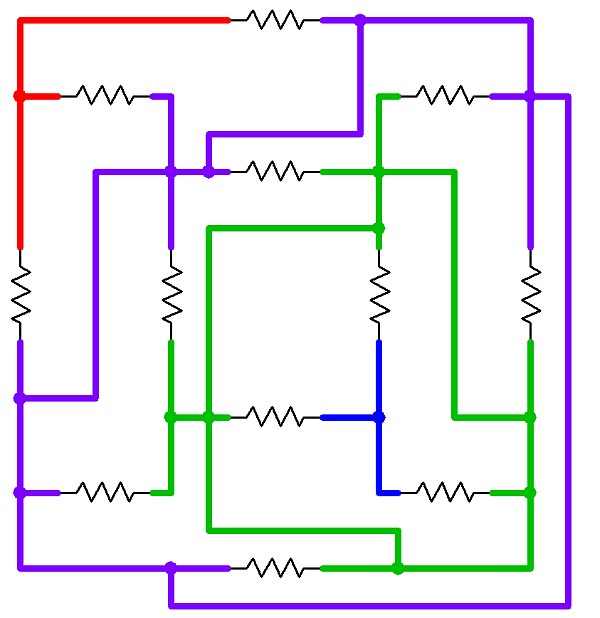
Here is a schematic of the original cube configuration…

A schematic for a circuit electrically equivalent to the Resistor Cube. (Click for larger.)

…and here is a schematic of the cube with the equipotential connections in place.

The same schematic, with connections added between the equipotential points. (Click for larger.)

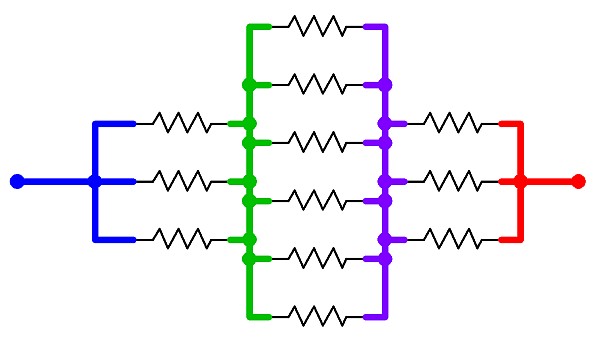
The problem now becomes trivially easy. The blue node is connected to the green node via three 1-ohm resistors; the green node is connected to the purple node via six 1-ohm resistors; and the purple node is connected to the red node via another three 1-ohm resistors.

The equivalent circuit -- a simple series-parallel network. (Click for larger.)

The total circuit resistance is therefore 1/3 + 1/6 + 1/3 ohms, or 5/6 ohm.


Posted in Analog, EET201, Electronics, Fundamentals, HOW-TO, Math | Leave a comment

Arduino on Steroids

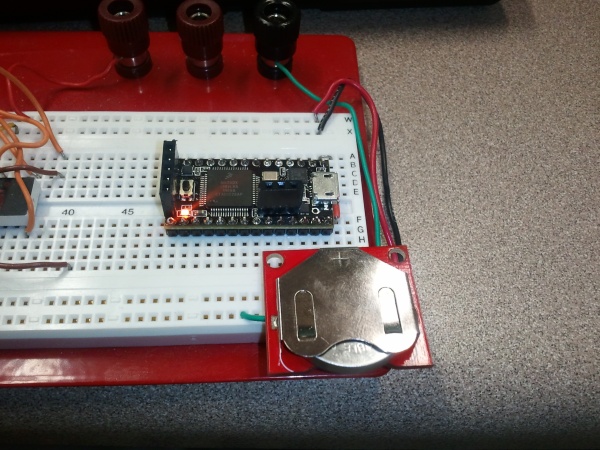
The Teensy 3.0 is a cool little dev board. It’s Arduino-compatible (from a software perspective, anyway), breadboardable, and only about $20US.

The Teensy 3.0 running from a 3.7V coin cell on a breadboard. (Click for larger.)

It also runs a 48MHz, 32-bit Arm processor, making it not only easy to use, but a speed demon. If that’s not enough, it can be overclocked to 96MHz reliably enough that this is left as an option in the Arduino plug-in code provided with the board.

Like all Arduinos, the Teensy can be programmed from the Arduino IDE, although the various differences mean that you’ll need the Teensyduino mod before you can get up and running. Install the latest Arduino IDE first, then Teensyduino.

With additional features such as digitalWriteFast(), the high speed of the Teensy 3.0 can be put to use. Within a few minutes of setup, I had an I/O pin toggling at speeds as high as 50MHz.

Dev boards like this can come in handy for all kinds of projects. A board like this has the horsepower to handle color displays with complex graphics, autopilot and other control-system-type computations, and many other tasks — even simultaneously.

Posted in Arduino, C, Coding, Digital, Electronics, Toys | Leave a comment

‘Git’ along, coder dogies!

When working on nontrivial coding projects, it’s often helpful to be able to keep track of changes made, version by version. When more than one developer is involved, it’s also helpful to be able to coordinate updates among them.

Several version control solutions have been developed over the past couple of decades or so. One of the most popular ones for open-source projects is git. Developed by Linus Torvalds (of Linux fame), git allows version tracking of software projects (or really, any file-based project.)

Here are my initial impressions as I start using git. Disclaimer: I am a git newbie; while I have a reasonable understanding of what version control in general and git in particular are about, I am by no means an expert.

To start using git, a git client must first be installed. Traditionally, this is git for Linux, but I decided to try out git starting with a chip tester project written in PIC assembly, so I installed the GitHub client for Windows. (GitHub is a central service which can store open-source projects free of charge, and/or private, closed-source projects for a subscription fee.)

A git “repository” (project) is started by creating a local repository (the directory in which the files will reside, along with a few small files describing the repository contents.) These files contain the repository name, a brief description, and usually a list of files to include or ignore when updating the repository online.

Once the source files have been added, they are staged and then “committed.” This creates a “commit,” which is a snapshot of the project at that point. (It’s advisable to have the project in a reasonably stable state, when performing a commit.) At that point, other developers can “clone” the repository, to pick up a copy of the entire project.

The git client also tracks which files have been updated since the last commit. If, for example, a bug was fixed in an include file and the README file was updated, the git client would flag these as having been changed. Once the changed (and/or new) files are selected and a commit comment is entered, the main repository can be easily updated.

If you work with PIC microcontrollers and want to try out a (very pre-alpha) chip tester, you’re welcome to check out the repository I created.

“Share and enjoy!”

Posted in C, Coding, Digital Citizenship, Internet, Linux, System Administration | Tagged , , , , , , , , , | Leave a comment

I Have Seen Nirvana, And It Is In Shenzhen…

On the one hand, I would love to take about $1000 cash and just go shopping here.

On the other hand, if I brought my wallet, I’d be broke for the next six months for sure. Maybe it’s a good thing that I’m some ten thousand miles and a travel visa away?

Posted in Analog, Components, Digital, Electronics, Resources, Tools, Toys | Leave a comment